How To Report Device State Using a Custom MQTT Topic
This guide will walk you through using a custom MQTT topic to report state to the WEGnology Broker. To store data within WEGnology’s time-series database, a device must report state. State can be reported by using MQTT to publish data to the following topic:
wegnology/DEVICE_ID/state
After configuring a device with attributes, if you publish data to the state topic in the correct format, data will be stored and made available within visualizations and workflows.
By creating and subscribing to custom MQTT topics, developers can:
- Gain more control of the MQTT topics used within the application to report state.
- Transform or pre-process data within the Workflow Engine before reporting state.
WEGnology gives you the ability to configure custom MQTT topics that can trigger a WEGnology Workflow. From within a workflow, you can use the Device: State Node to report state.
Let’s dive in.
Prerequisites
Before you begin, you need:
- Familiarity with MQTT
Configure a Device, Access Key, and Secret
To configure a device, access key, and secret:
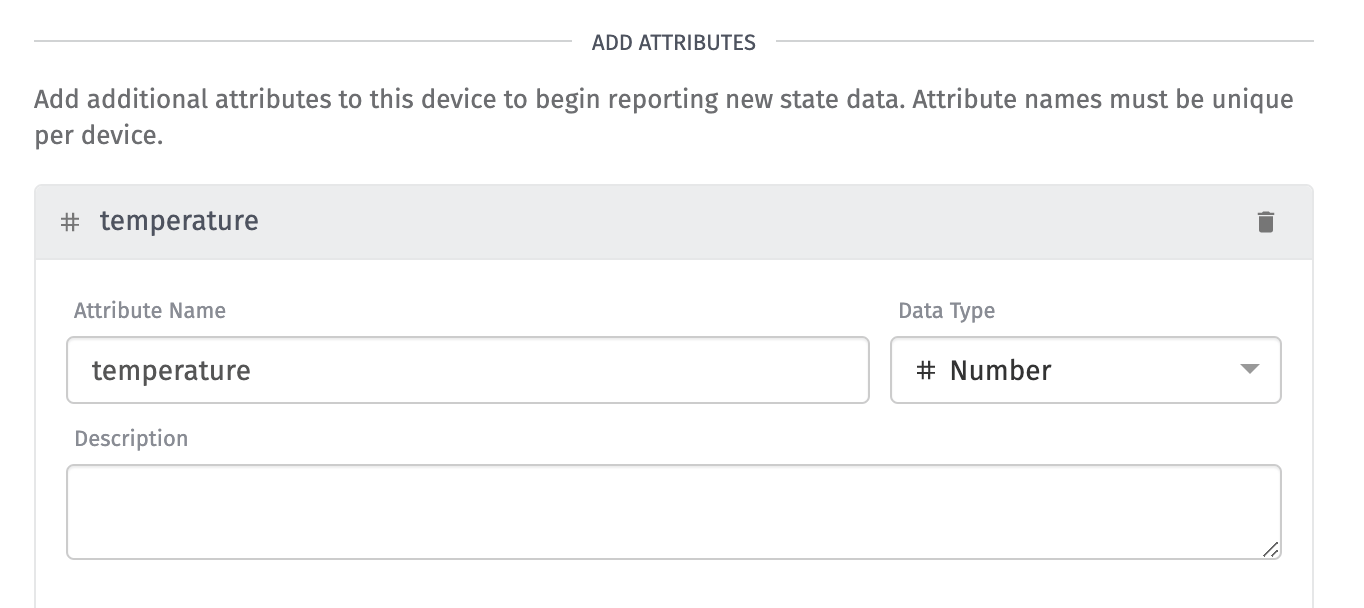
- Create a Standalone Device with a “number” attribute called
temperature.
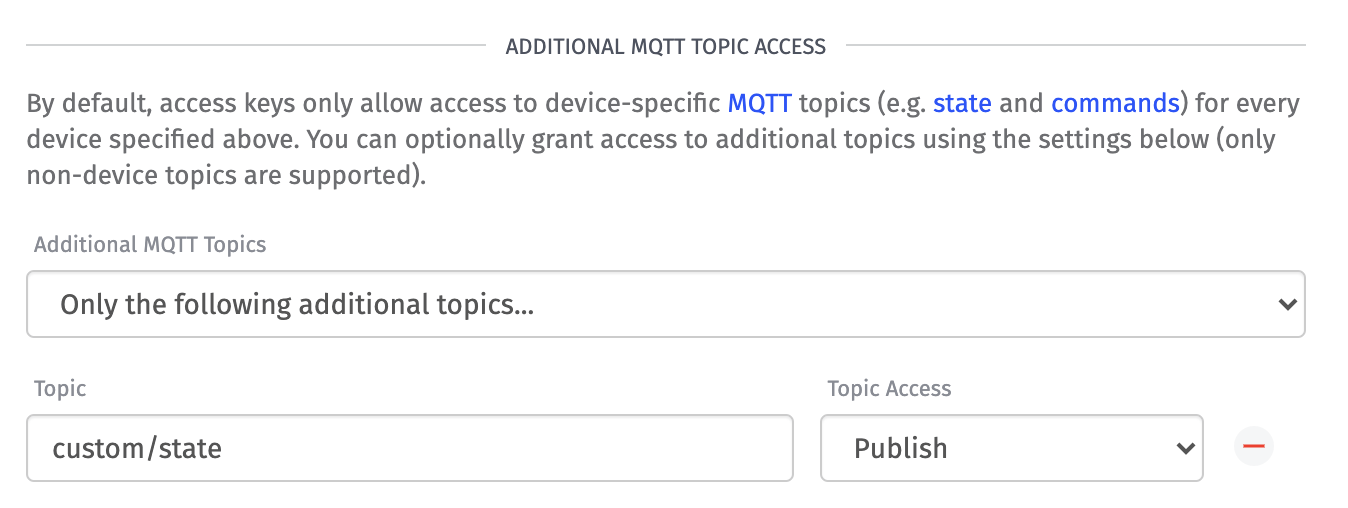
- Create an Access Key and Secret. By default, access keys only allow access to WEGnology-specific topics (e.g. state and commands) for every device you have allowed. Here, you can specify multiple non-WEGnology MQTT topics.
- Configure a new custom topic called
custom/state. - Set the “Topic Access” to
Publish.
- After creating the device, access key, and access secret, store them for reference as you will need the Device’s ID and the access key/secret to connect to the MQTT Broker.
Connecting to the WEGnology Broker
You can now connect to WEGnology via MQTT. The configuration of MQTT is dependent on your device and environment.
WEGnology requires the following MQTT settings to be correctly set on all MQTT connect calls:
client id: Must be a valid Device ID that is already registered with the WEGnology Platform.username: Must be a WEGnology Access Key.password: Must be a WEGnology Access Secret, which is generated when creating an Access key.
For more details on connecting to the MQTT Broker, see the documentation.
For this tutorial, configure your device to report to the following topic:
custom/state
Here is an example data payload:
{ "deviceID": "deviceID", "temperature": 42}
If you do not have a device, you may use an MQTT GUI client like MQTT Explorer, or an example using Node.js such as the one provided below.
Example Using Node.js
Here is an example that uses the Node.js MQTT library to publish a random value to the custom/state topic on the WEGnology Broker:
const mqtt = require("mqtt");

const deviceID = "deviceId";
const accessKey = "accessKey";
const accessSecret ="accessSecret";

const client = mqtt.connect("mqtts://broker.wegnology.com:8883", {
  username: accessKey,
  password: accessSecret,
  clientId: deviceID,
});

client.on("connect", function () {
  console.log("Connected!");
  // Send temperature once every second.
  setInterval(function () {
    const randomValue = Math.floor(Math.random() * Math.floor(100));
    console.log(`Publishing the value: ${randomValue}`);
    client.publish("custom/state", `{ "deviceID": "${deviceID}", "temperature": ${randomValue}}`);
  }, 2000);
});

client.on("error", (err) => {
  console.log(err);
});
Note: When publishing to a custom topic, you must provide a reference to the device as it is used to refer to the device reporting state using the Application Workflow. In the example above, you send it along with this data:
client.publish("custom/state", `{ "deviceID": "${deviceID}", "temperature": ${randomValue}}`);
Reporting State in a Workflow
Now you can build your workflow to listen to the custom topic, decode your data, and report state.
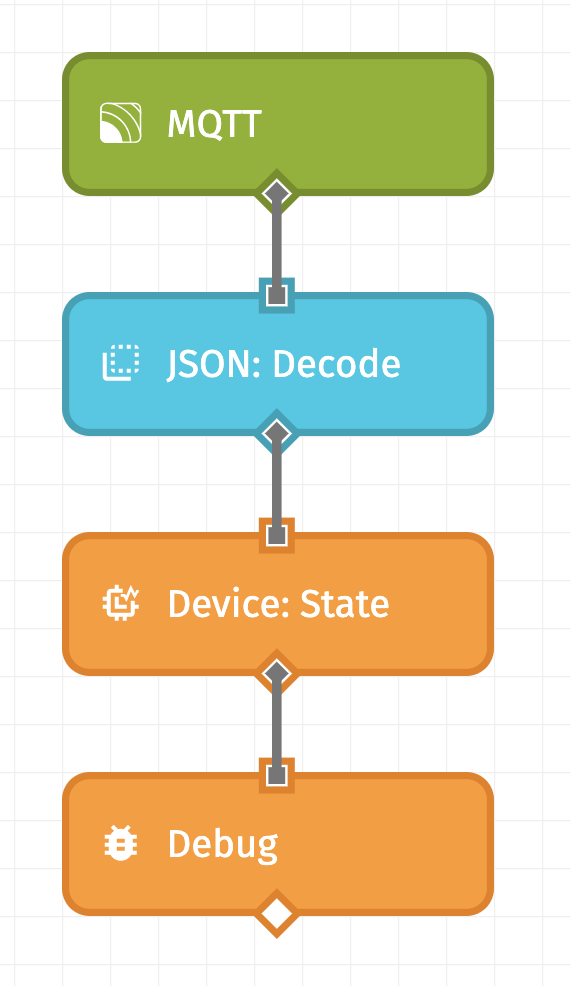
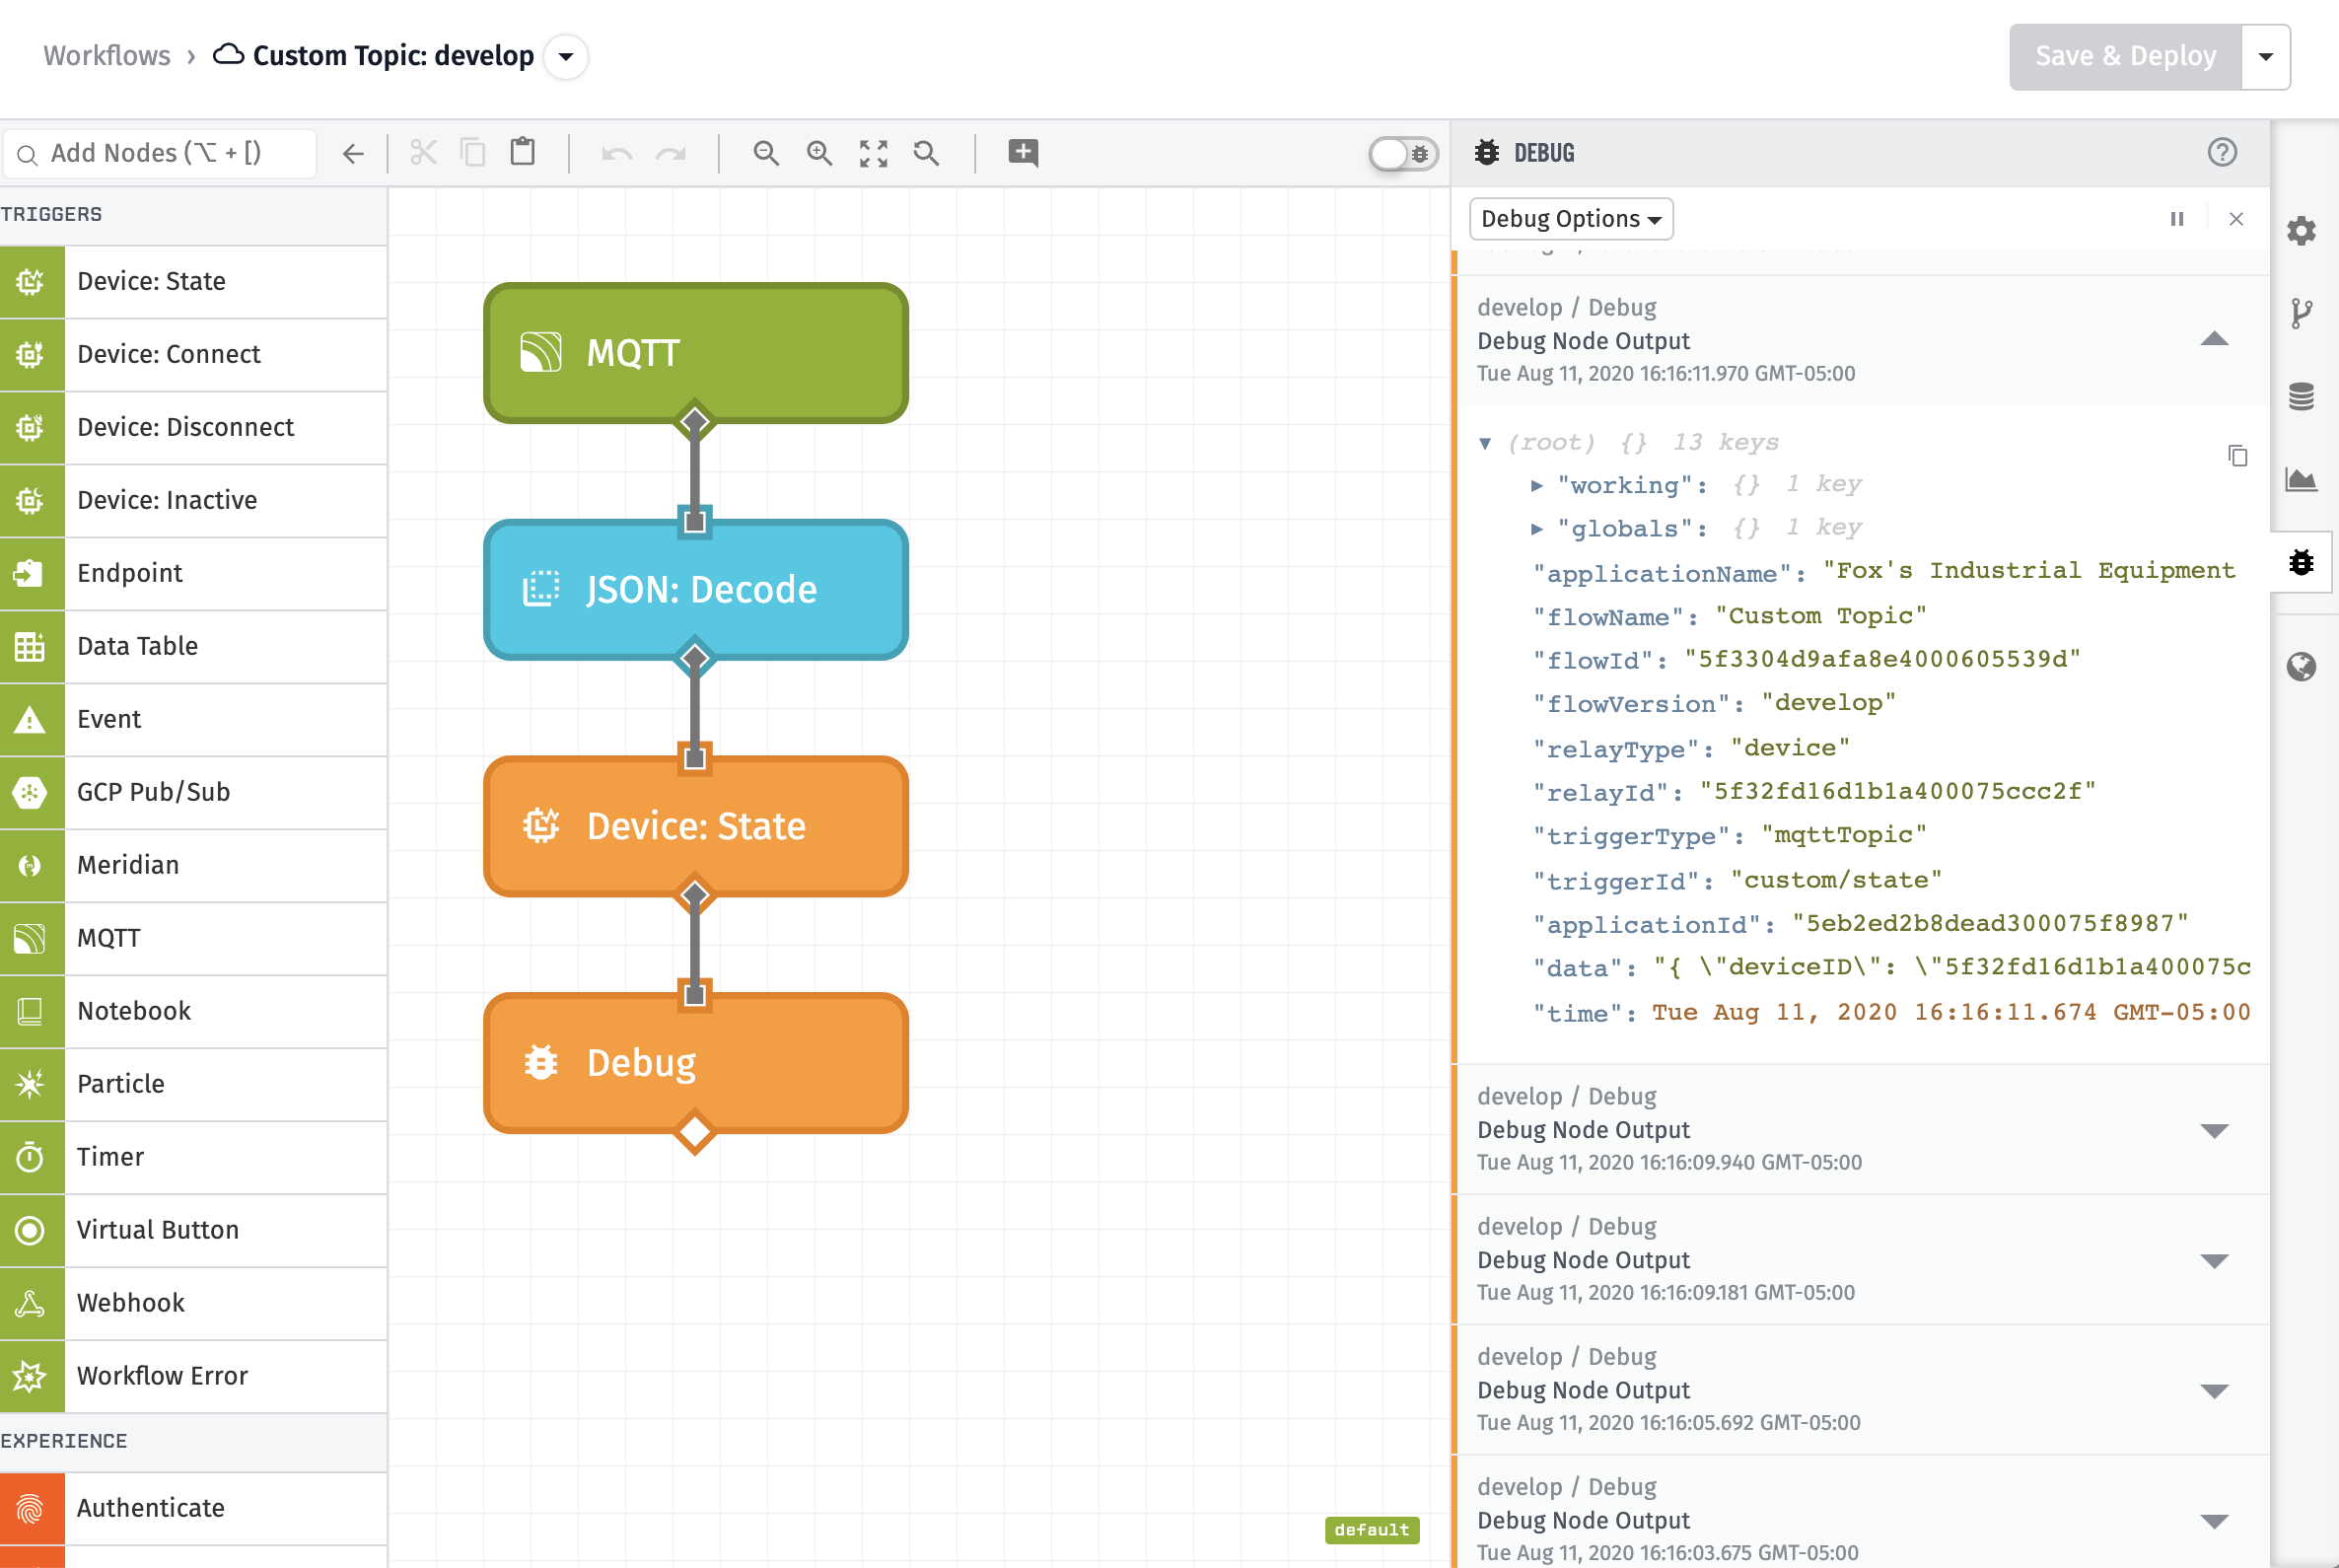
Here is the Application Workflow you will build:
To create this Application Workflow:
- Drag the MQTT Trigger onto the workflow canvas. This enables the workflow to listen for custom topics.
- Connect a JSON: Decode Node to the MQTT Trigger. This allows you to serialize the MQTT payload properly.
- Connect a Device: State Node to the JSON: Decode Node. This allows you to report state from within a Workflow.
- Connect a Debug Node to the Device: State Node. This displays the payload in the Debug Panel.
Now, let’s configure each node.
MQTT Trigger
To configure the MQTT Trigger, set the “MQTT Topic” to your custom state topic: custom/state.
JSON: Decode Node
The JSON Decode Node allows a workflow to decode a JSON string into an object on the payload.
To configure the JSON Decode Node:
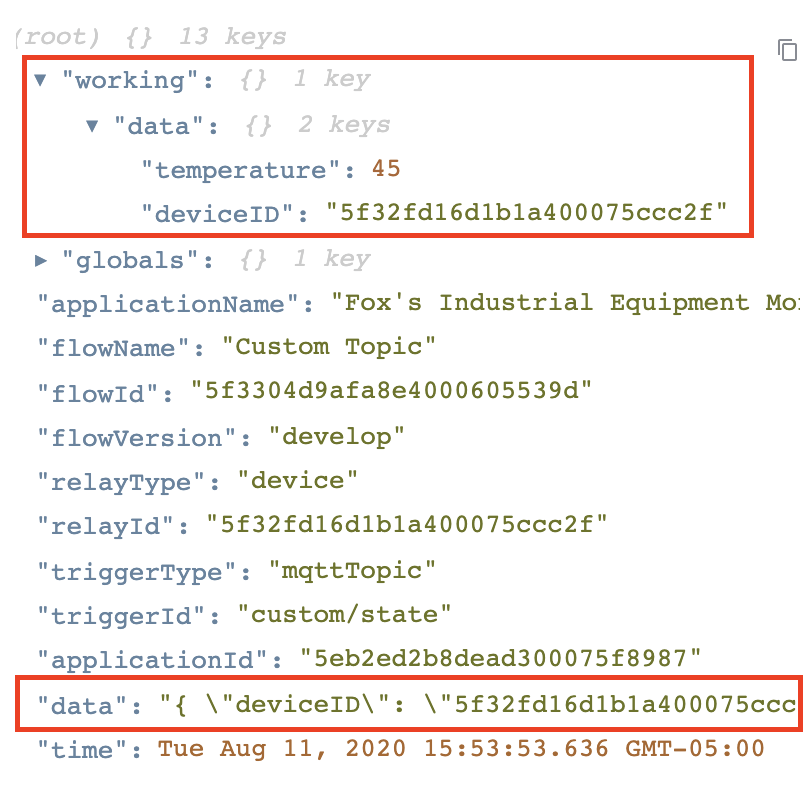
- Set the “Source String Path” to
data. - Set the “Destination Path” to
working.data.
After decoding the value properly, you’ll be able to see the before (data) and after (working.data):
In this example, you used JSON, which is commonly used, but you can encode and decode many formats within the Workflow Engine. Here are some resources to learn more:
Device: State Node
Now that your data is decoded on the payload properly, you can use it to report state. To configure the Device: State Node, in the “Device” configuration:
- Select “Use a Device ID specified on the current payload.”
- Set the “Device ID JSON Path” to
working.data.deviceID.
In the “State” configuration:
- Set the “Attribute” to
temperature. - Set the “Value” to
{{working.data.temperature}}.
Now, your workflow is complete.
Verifying
To verify things are working properly, check the Workflow Debug Log. Since the workflow you configured uses the Debug Node, as you publish to the custom topic, you will see your Debug Panel populate with the payload:
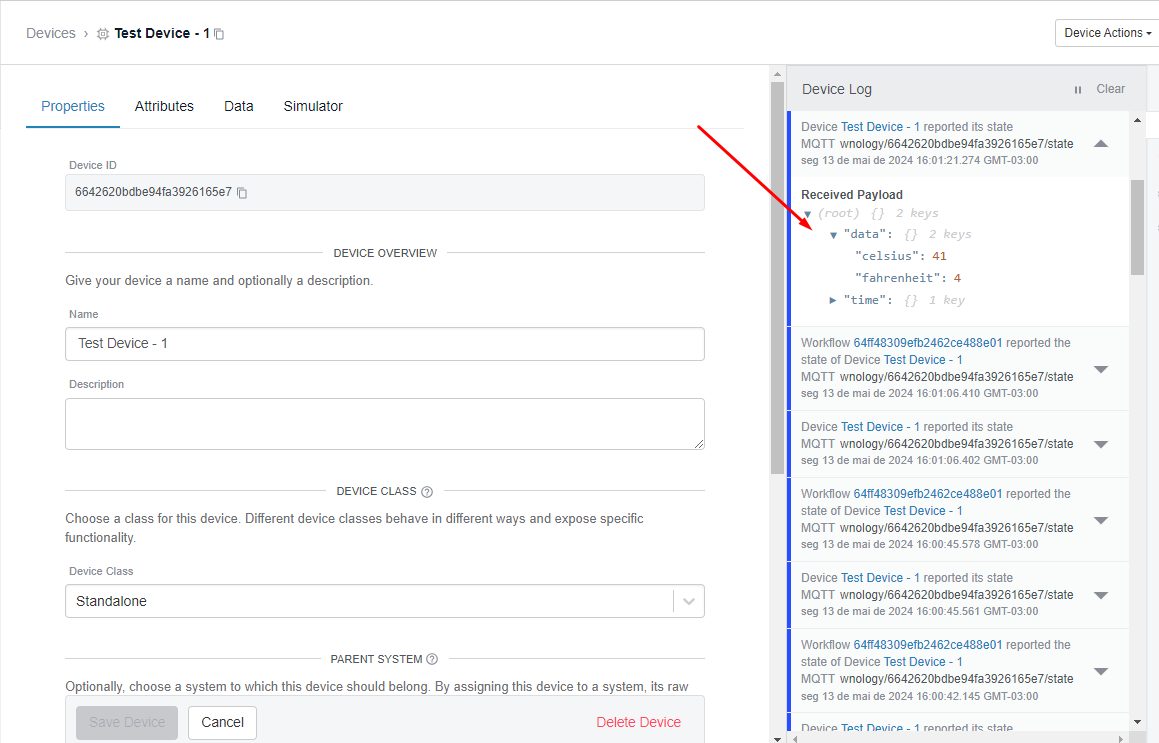
To verify that your workflow is reporting state to your device, look at the Device Log. It displays a real-time stream of events that occur on your device. See below:
Was this page helpful?
Still looking for help? You can also search the WEGnology Forums or submit your question there.