Applications
An application is any program in WEGnology that is designed to perform a function for the end user. Applications can encompass multiple devices and workflows, however, devices and workflows can only be part of a single application at a time. You can view application data for one application or many in Dashboards.
Creating Applications
There are two methods in which you can create an application in WEGnology:
- Click the Add Application button in the top right corner of the Applications Screen.
- Click the applications submenu on the left side of the screen and then click Add Application.
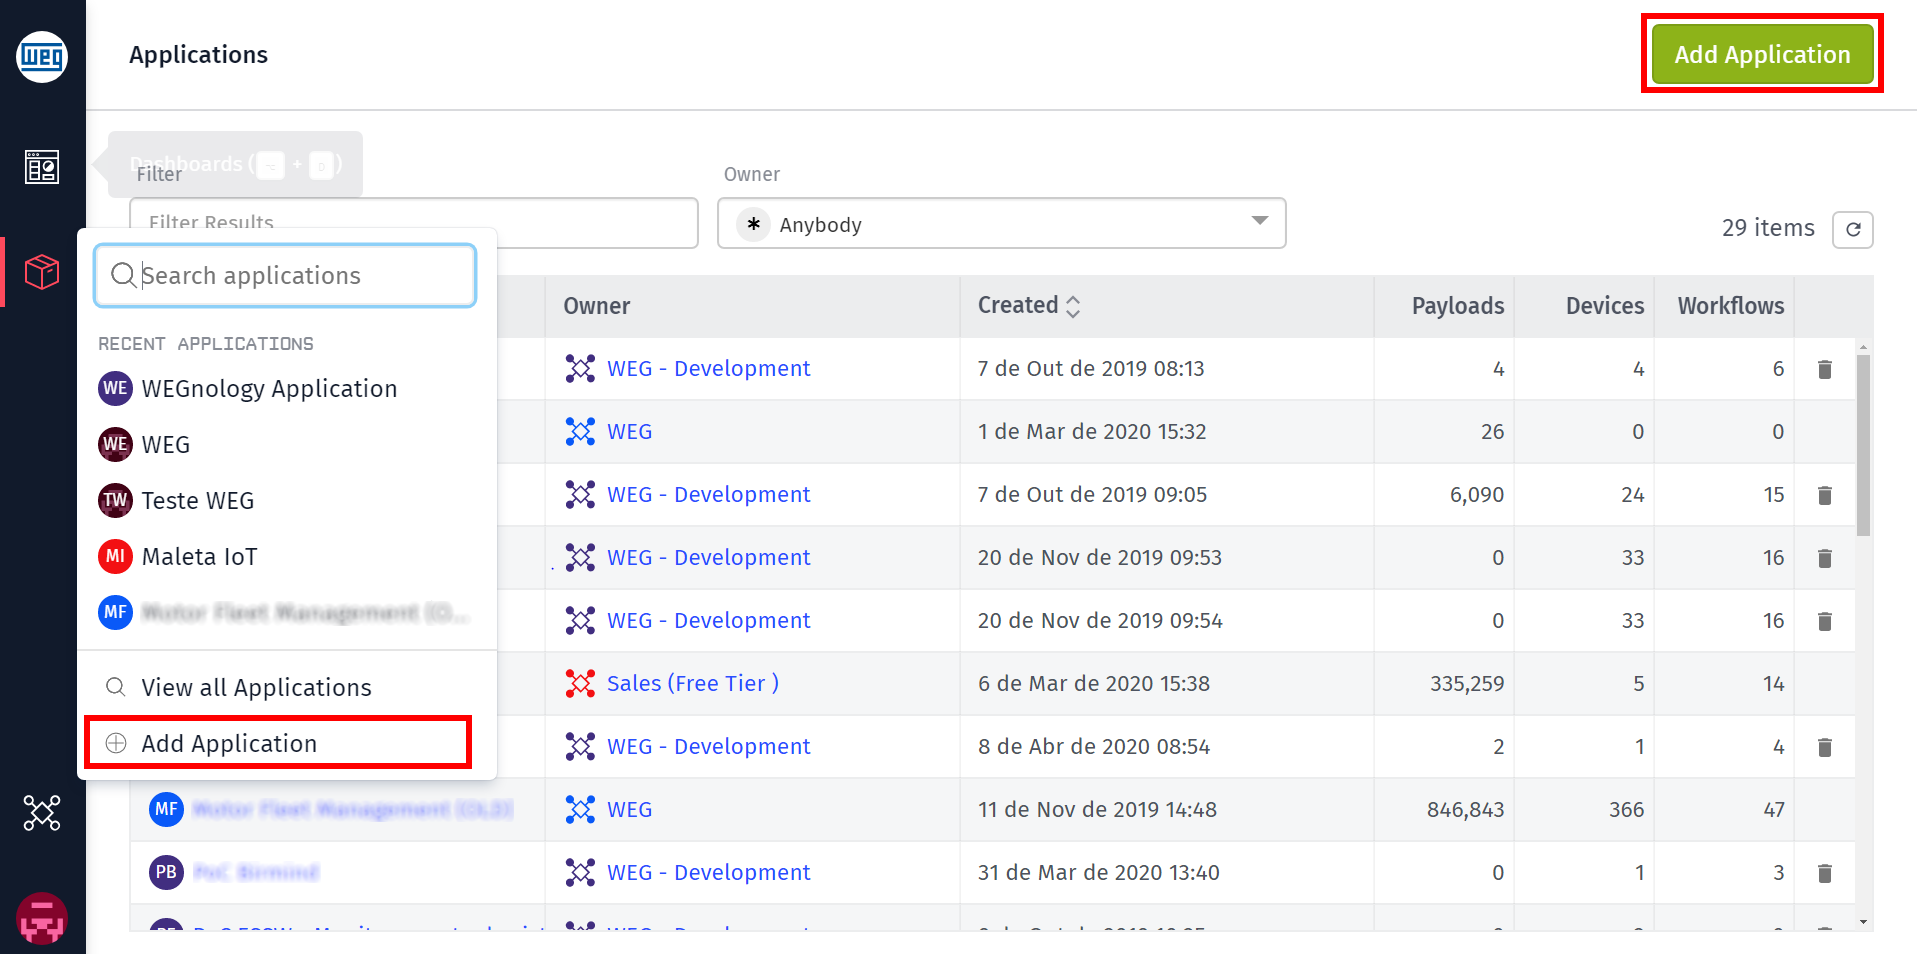
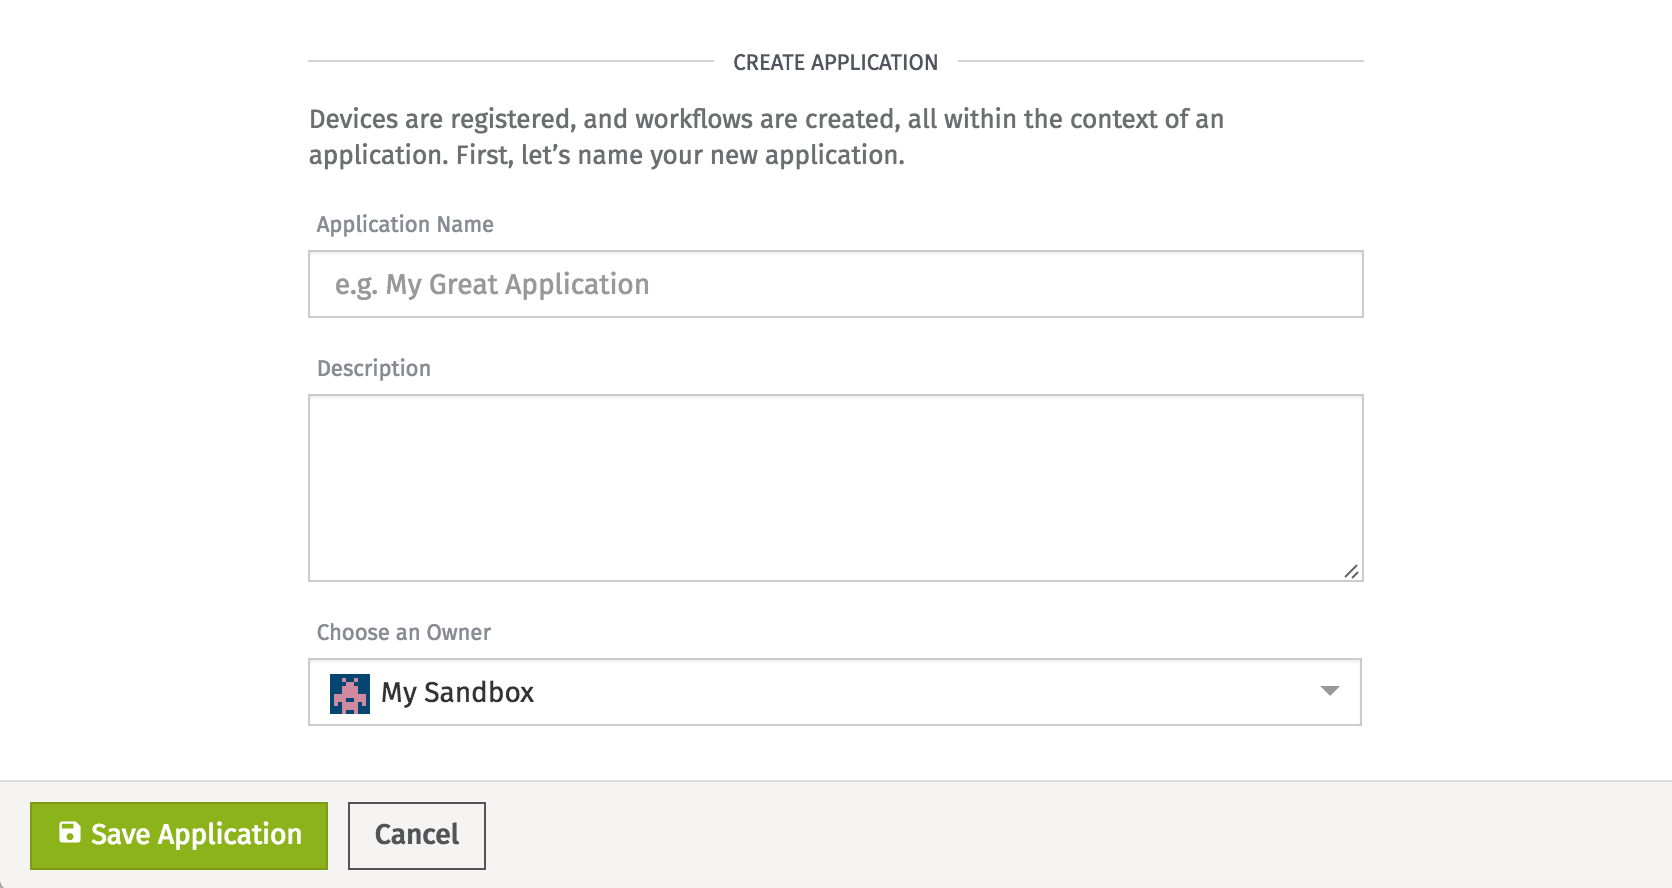
When creating an application, you are prompted to enter the following information:
- Application Name—Name used to identify your application. The name can be changed at any time in the Application Settings.
- Description—Optional. More detailed description of the application.
- Owner—Creator of the application. Your application must be scoped to your personal Sandbox or to an organization for which you have the Editor role. The owner can be changed at a later date only if you have Administrator permissions for the parent organization (or Sandbox).
Deleting Applications
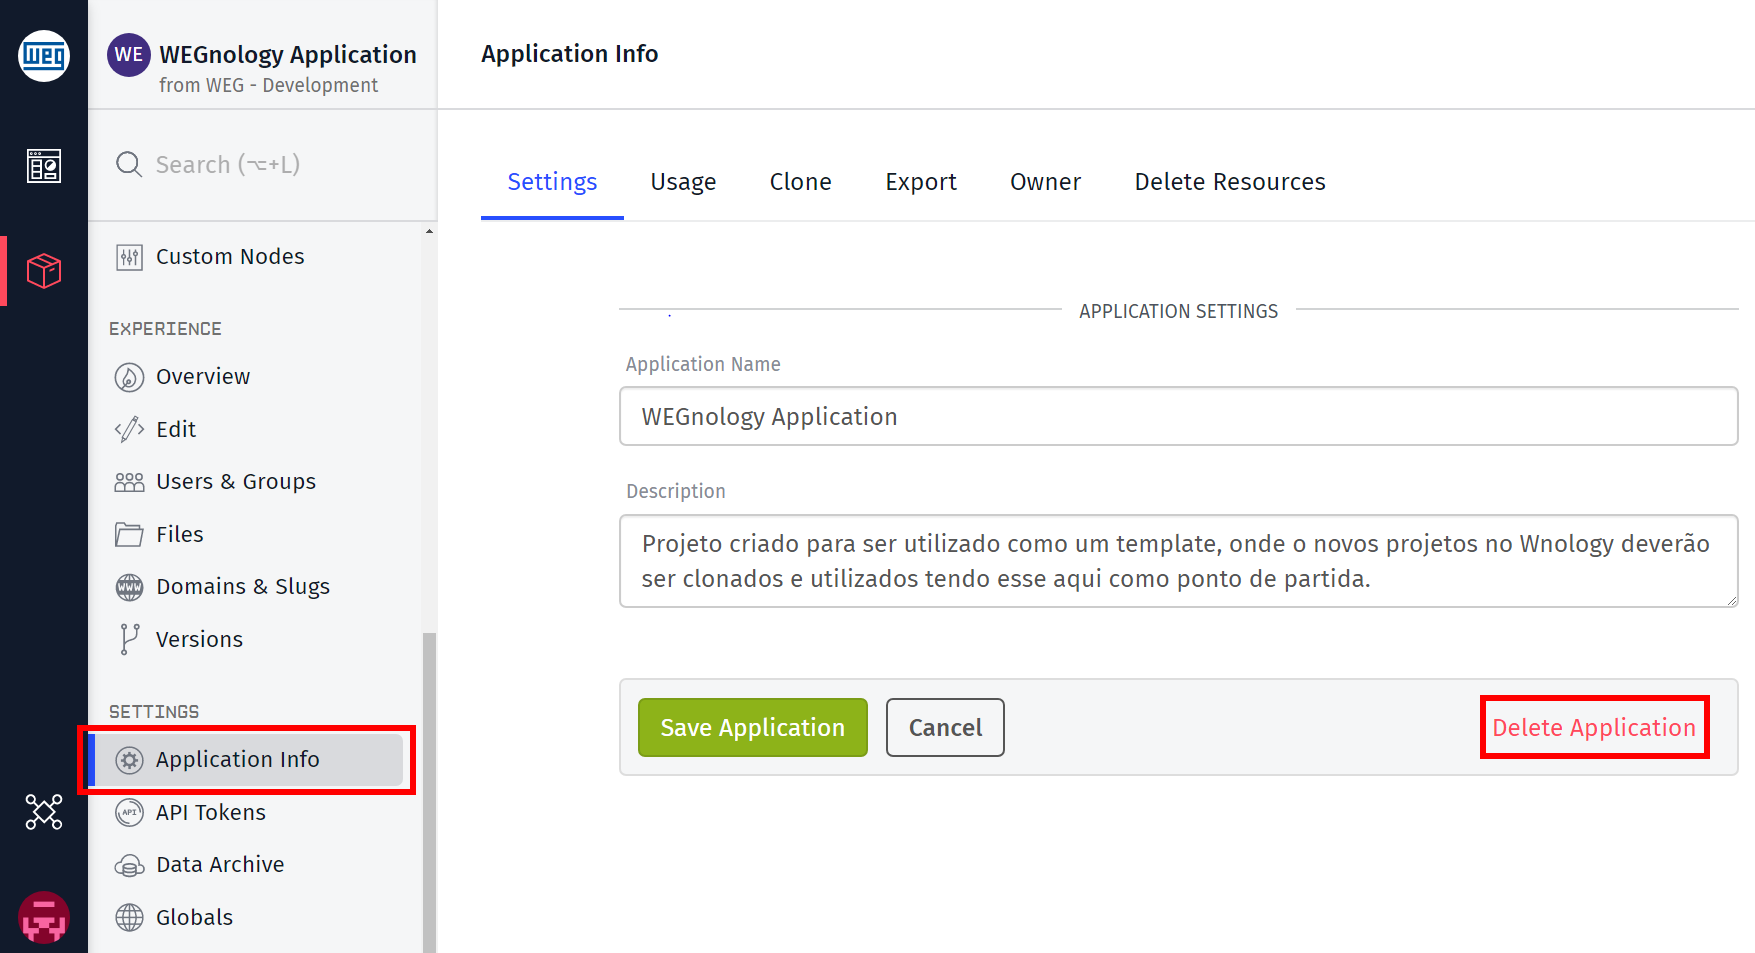
To delete an application:
- Open the application page for the application you wish to delete.
- Navigate to Settings > Application Info > Delete Application.
Application Log
The Application Log is a real-time log that displays information about various aspects of your WEGnology application. It’s most used for debugging purposes.
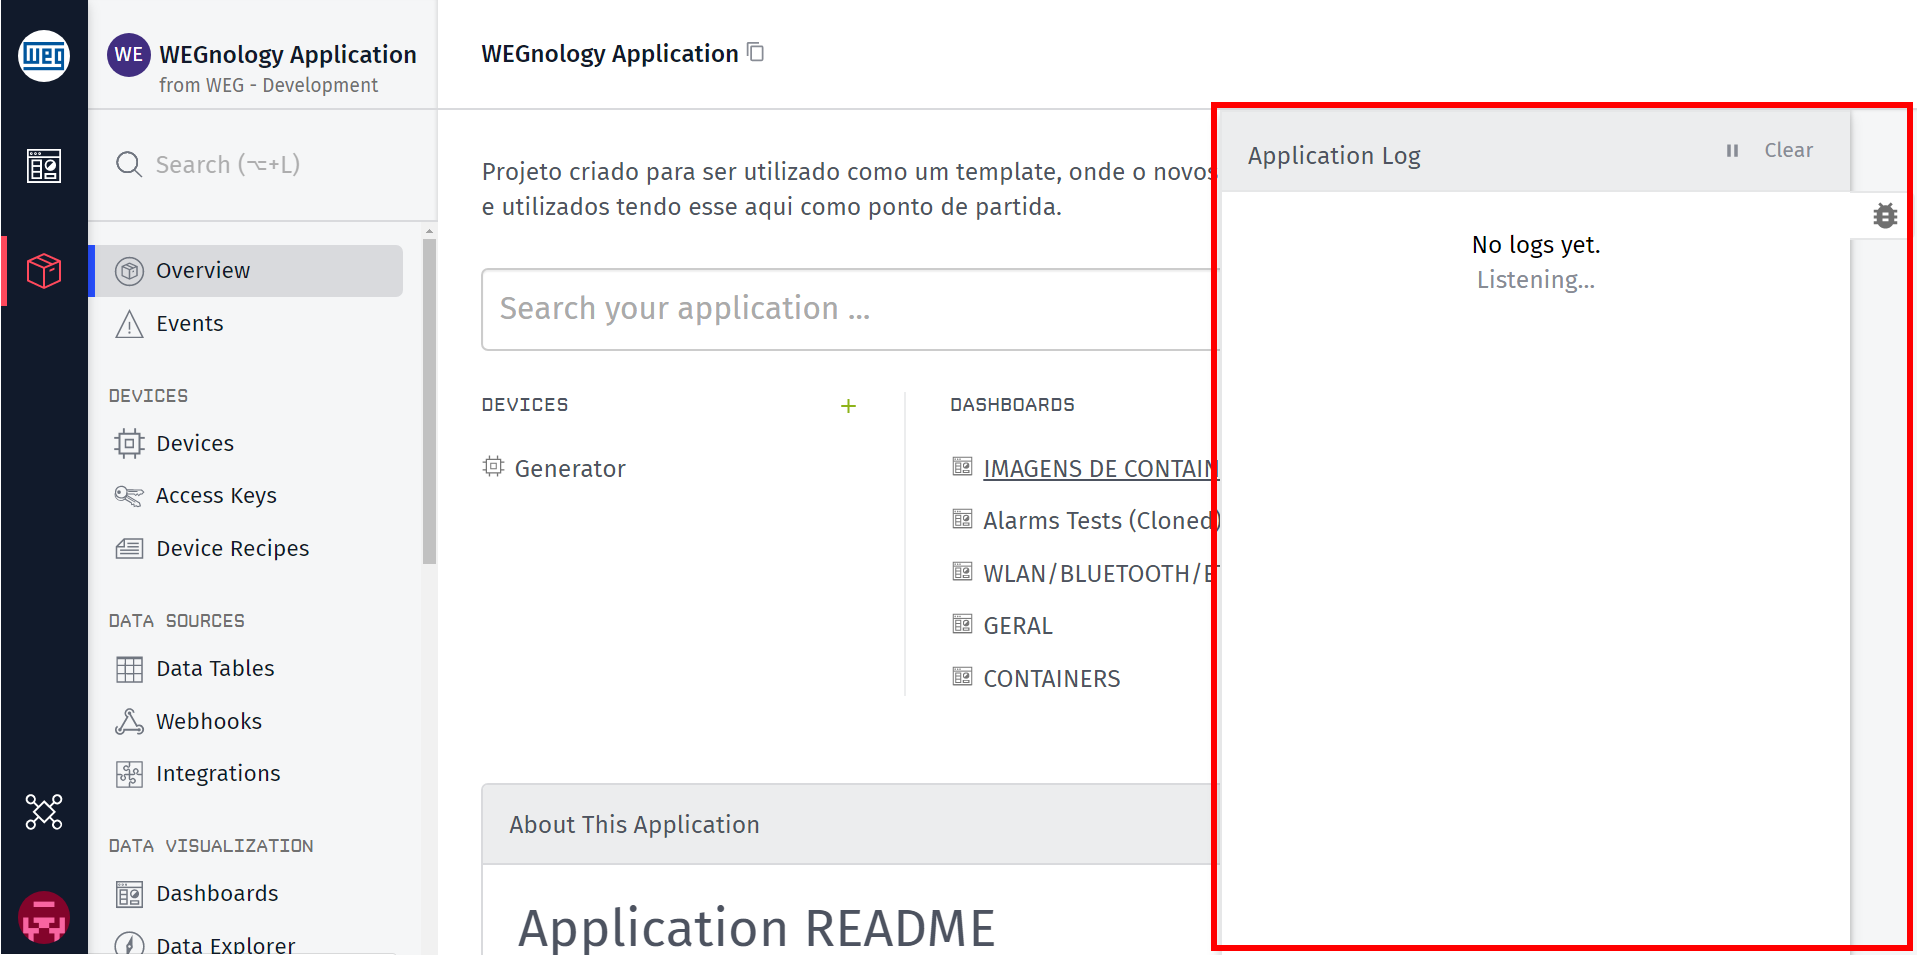
As a real-time tool, the Application Log always begins in an empty state. Logs appear as actions on your application take place. Logs show for the following events:
MQTT
- MQTT Authentication—When an MQTT client successfully connects or fails to connect to the WEGnology MQTT broker.
- Raw MQTT Messages—When MQTT Messages sent or received by the WEGnology MQTT broker.
Device
- Device State—When devices report state.
- Device Commands—When WEGnology sends a device command.
- Device Connection Status—When devices successfully connect or disconnect from WEGnology via the MQTT broker or the REST API.
Webhooks
- Webhooks—When a Webhook is triggered.
- Webhook Replies—When WEGnology replies to a Webhook.
Endpoints
- Endpoint—When a request is made to a WEGnology Experience Endpoint.
- Endpoint Reply—When WEGnology replies to an Experience Endpoint.
Integrations
- Integration Messages—When WEGnology receives a message from an Integration.
Application Search
To find resources quickly, you can search using one of two search bars. Your search results vary slightly depending on which search bar you choose. Clicking a result navigates you to its corresponding page.
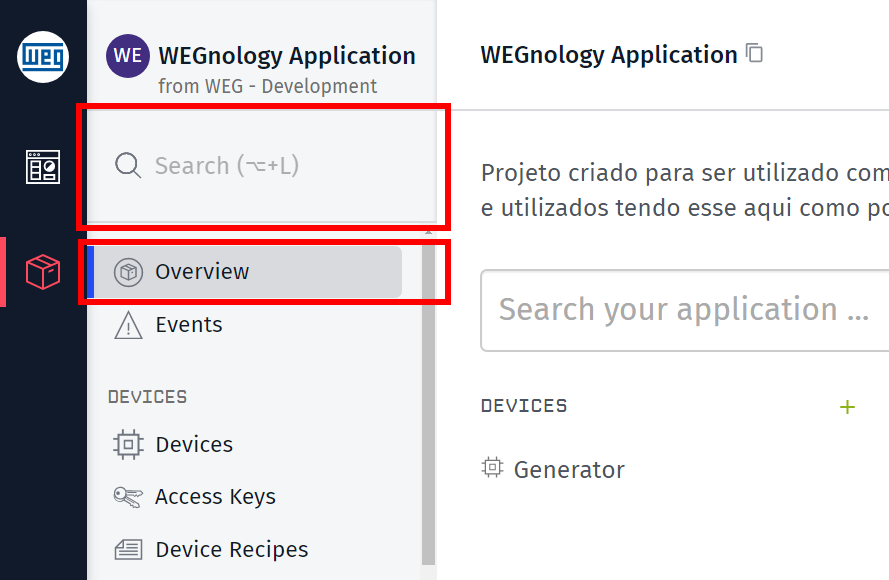
Application Overview Search
The application overview search can be accessed on the application overview page. Click Overview in the application subnavigation on the left of any page. On clicking in the search bar, a dropdown menu appears with your search results.
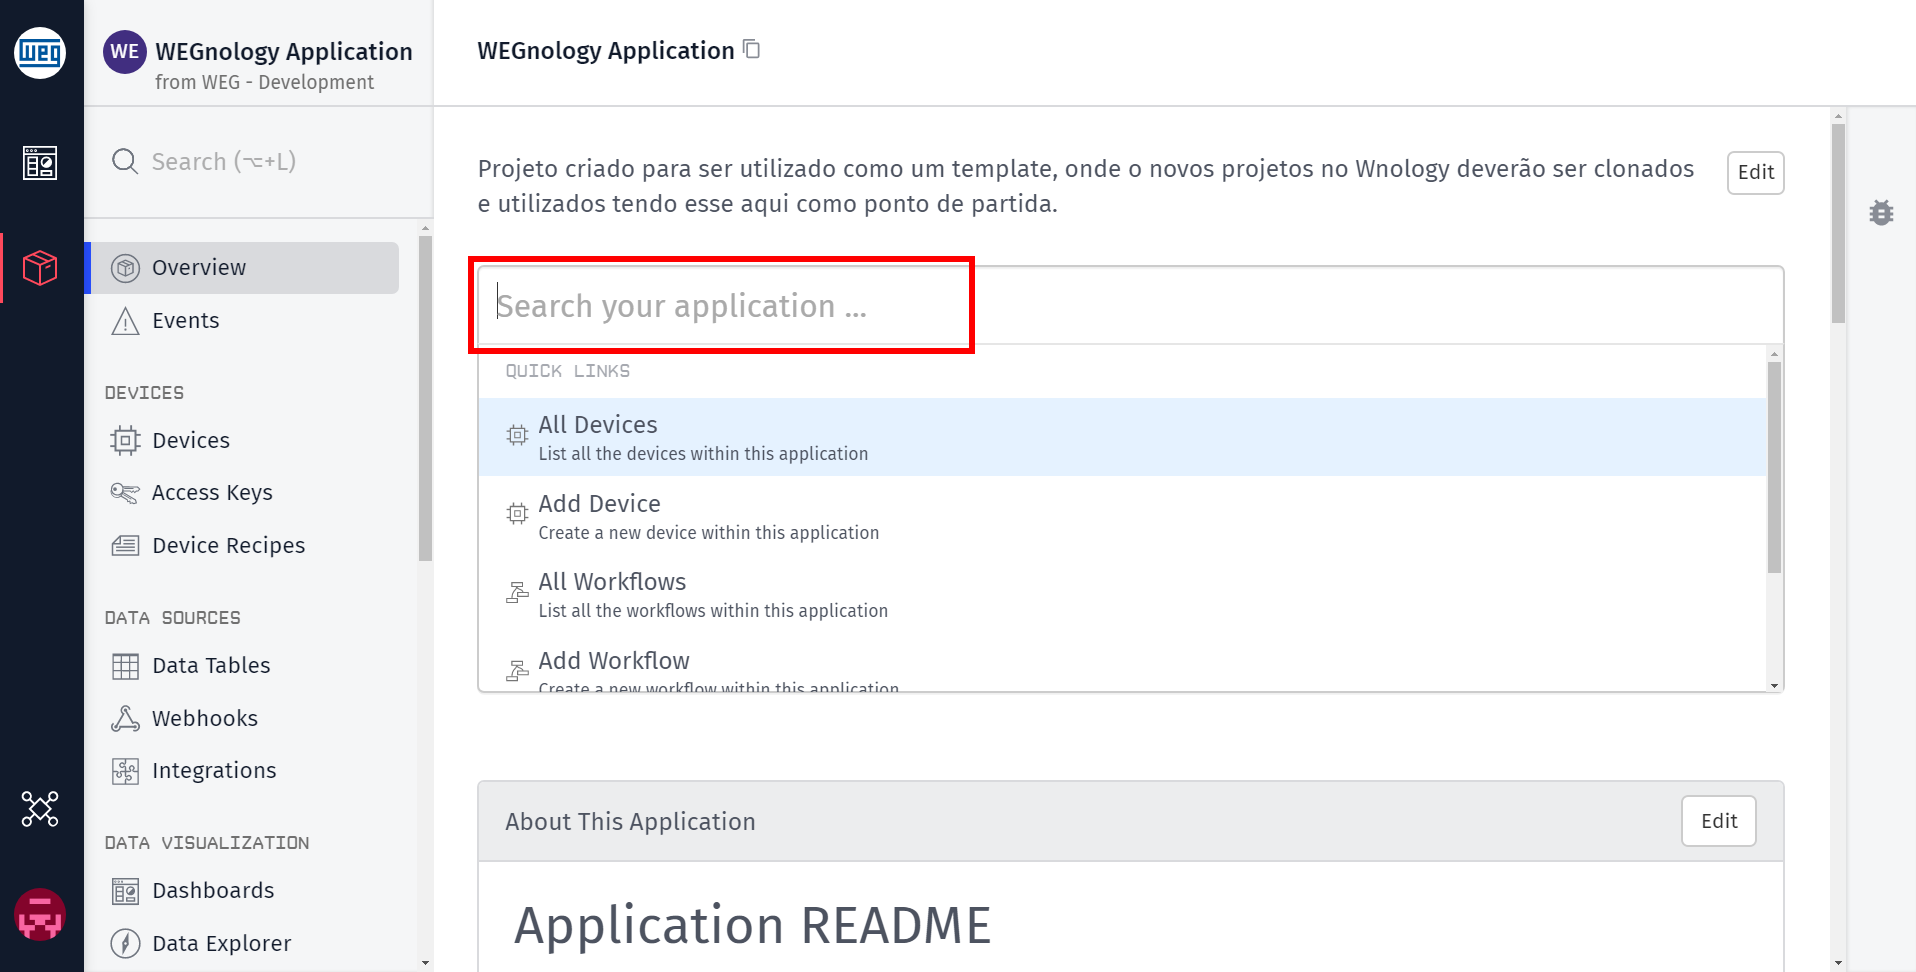
In an empty state, the dropdown displays a list of quick links. Once you enter a search term, the dropdown updates and populates a list of all items in your application that match your search.
Subnavigation Search
The subnavigation search panel can be accessed from anywhere in an application on the left navigation panel.
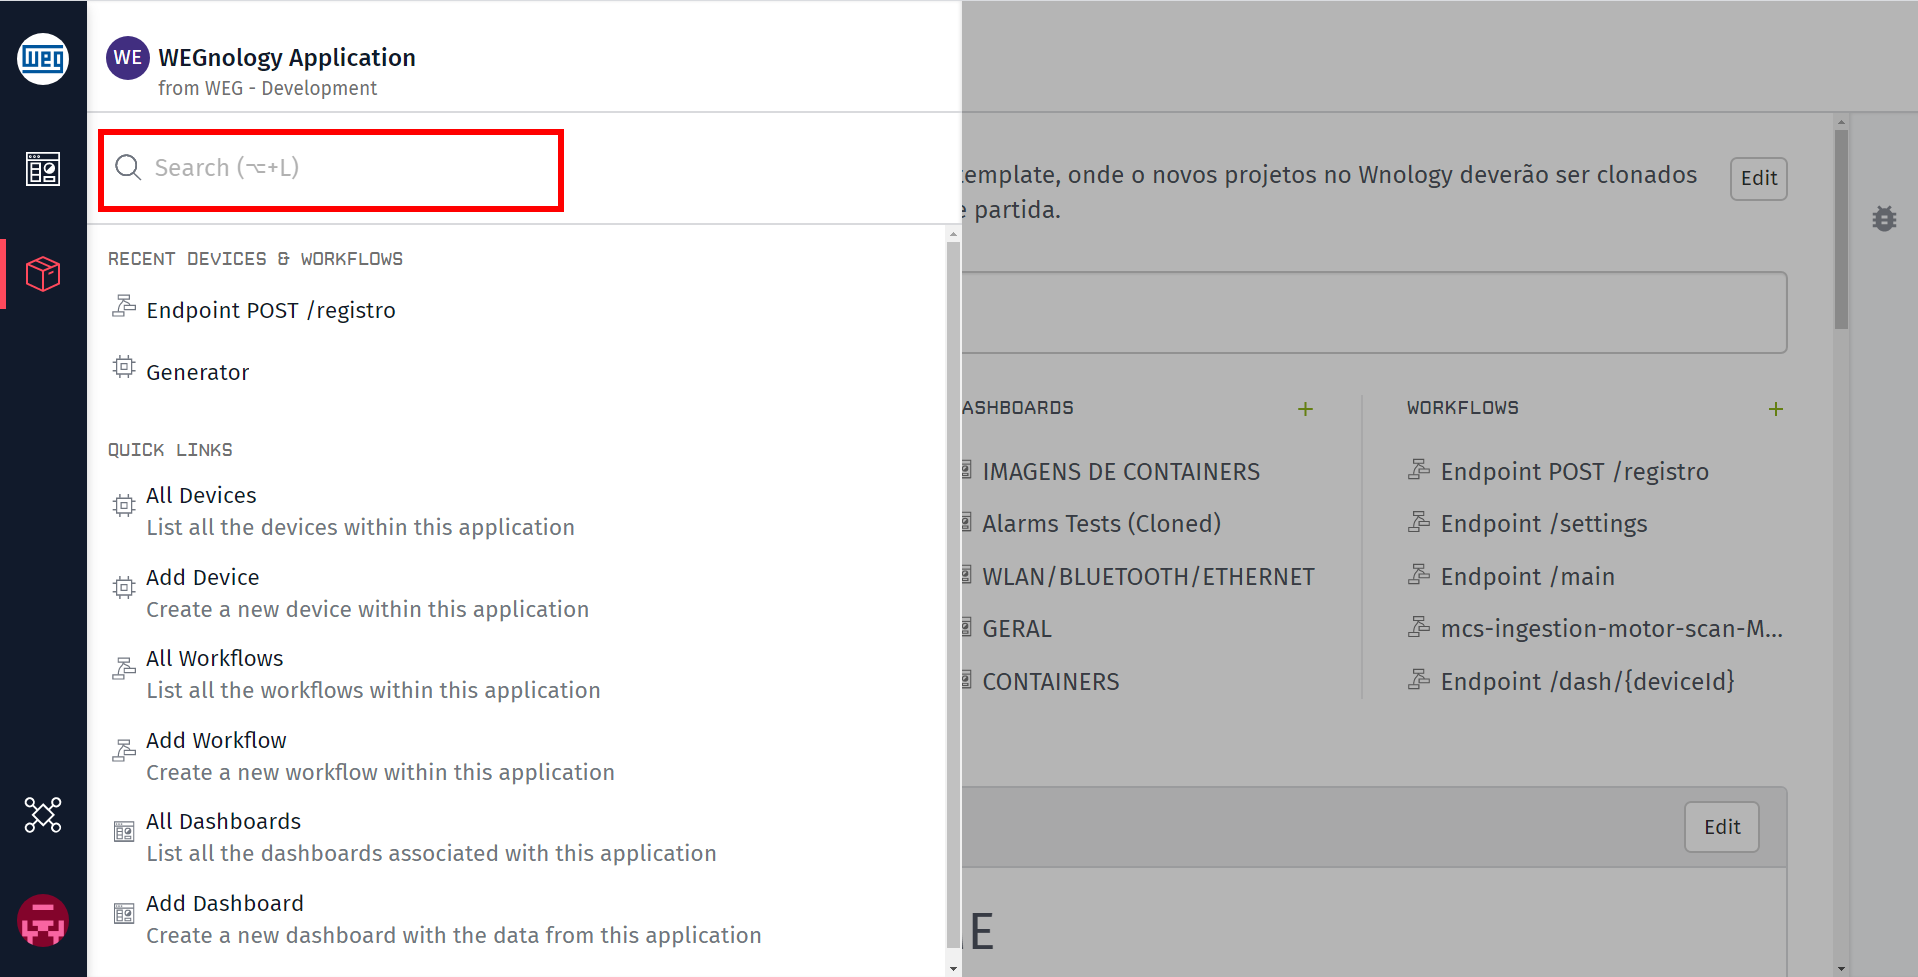
In an empty state, the panel displays a list of the devices and workflows in that application that you have looked at most recently, as well as a list of quick links. Once you enter a search term, the panel populates a list of all items in your application that match your search.
Tip: The subnavigation search panel can be accessed by the keyboard shortcut Option (⌥) + L (if you’re using a Mac) or Alt + L (on Windows).
Application README
Every application includes a README, which is a tool to communicate implementation details between team members. Think of an application README as a concise synopsis of how your application works. The content of every application’s README differs depending on the application, however, every new application includes a default README with tips to get your writing started. READMEs are written in Markdown, which allows you to format the appearance of your file.
Application Usage
To view the payload, notebook minutes, and resource usage for an application, click the Usage subnavigation link under the “Settings” section of your application subnavigation.
The interface is similar to the organization usage page, except …
- Organization / sandbox limit information is not presented, as resources are not limited on a per-application basis.
- The per-application usage tables are not available since a specific application is already being viewed.
Application Globals
Application globals are a set of key/value pairs that are accessible inside of any workflow in the current application. This is a place to store application-wide configuration that is used across multiple workflows, like phone numbers or API keys. To view or manage your application globals, click the Globals link under the “Settings” section of your application subnavigation.
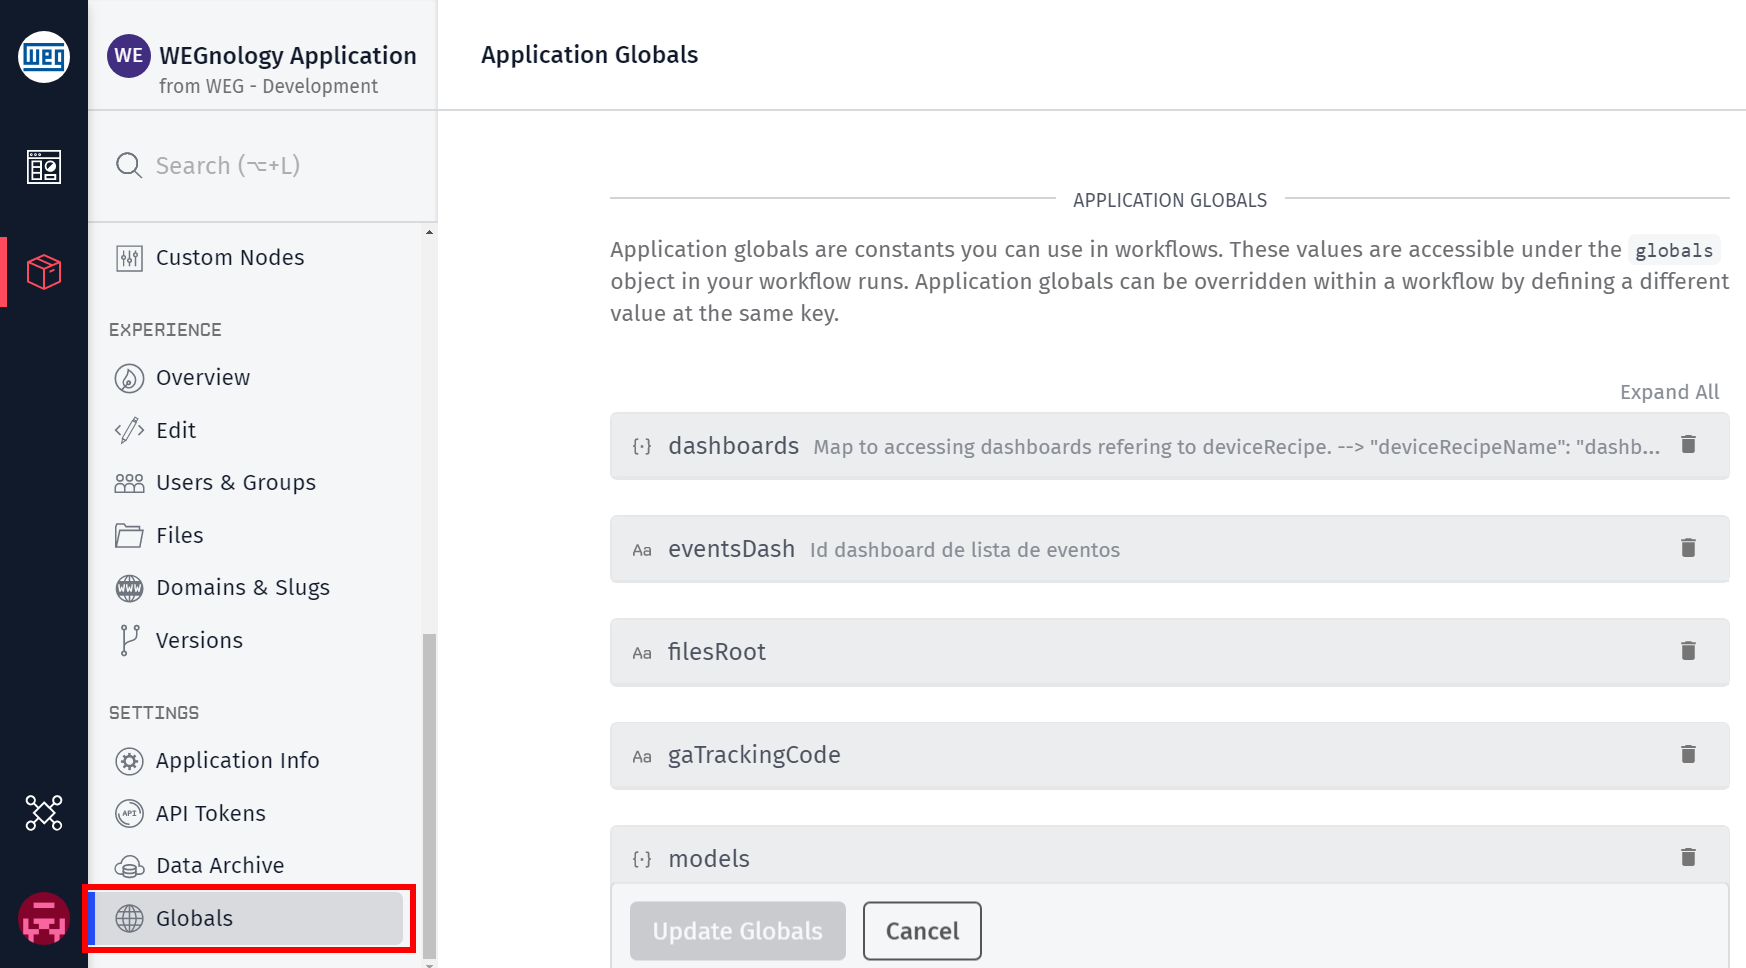
You can add a new global by clicking the Add Global button. This creates a new global variable for which you must enter the following properties:
- Key—The property name under which the global can be accessed. Keys are required, and they may only contain uppercase and lowercase letters, numbers, underscores, and hyphens (-). Keys must also be unique across your other application globals.
- Type—Type of data stored within this global: String (default), Number, or JSON.
- Value—Value to return when this application global is invoked within a workflow. This field is required and the input must validate against the global’s chosen type.
- Description—Optional. Description for this global that informs other collaborators how the global functions.
- Do not send to edge / embedded workflows—By default, application global values are sent down to your edge compute devices through your edge workflows. They are also sent down to your embedded devices through your embedded workflows. If the global contains sensitive information that you would rather not deploy to a device in the field, check this box to disable this behavior.
Any values configured here are accessible under the globals object in:
- The configuration for Integrations
- The configuration for Notebooks
- The configuration for Application Archiving
- The payload in a workflow run
- The default render context for an experience view
Application globals can be overridden in two ways:
- An experience version global with the same key but a different value will override the application global for that experience version only.
- A workflow global with the same key but a different value will override the application global for the workflow it is defined in.
Was this page helpful?
Still looking for help? You can also search the WEGnology Forums or submit your question there.
