User Profile
In a previous step, you added the ability for experience visitors to register for an account. Now, you'll build on the changes you made there and allow your experience users to manage their profiles.
Step One: Create the Endpoints
You'll add four endpoints: two for profile management and two for password changing.
GET /edit-profile
This endpoint is responsible for handling requests to view the "Edit Profile" page. From the "New Endpoint" page:
- Leave the
Methodset asGET. - Set the
Routeto/edit-profile. - Change the
Access ControltoAny authenticated user. - Set the
Unauthorized Reply TypetoRedirect, with aStatus Codeof302and aPathof/login. - Save the route.
- Return to the endpoints list page.
- Click "Add Endpoint" to add the next route.
POST /edit-profile
This endpoint is responsible for handling form submissions from the "Edit Profile" page.
- Set the
MethodtoPOST. - Set the
Routeto/edit-profile. - Change the
Access ControltoAny authenticated user. - Set the
Unauthorized Reply TypetoRedirect, with aStatus Codeof302and aPathof/login. - Save this route and back out to the endpoints list to make another one.
GET /change-password
This endpoint is responsible for handling requests to view the "Change Password" page.
- Leave the
Methodset asGET. - Set the
Routeto/change-password. - Change the
Access ControltoAny authenticated user. - Set the
Unauthorized Reply TypetoRedirect, with aStatus Codeof302and aPathof/login.
POST /change-password
This endpoint is responsible for handling form submissions from the "Change Password" page.
- Set the
MethodtoPOST. - Set the
Routeto/change-password. - Change the
Access ControltoAny authenticated user. - Set the
Unauthorized Reply TypetoRedirect, with aStatus Codeof302and aPathof/login.
Step Two: Create the Views
Now that all the endpoints have been created, move on to creating new views. You'll create two new pages, make one new component, and edit a component created in a previous step. Click "Edit" in the left column to return to your Experience Views list.
Page: Edit Profile
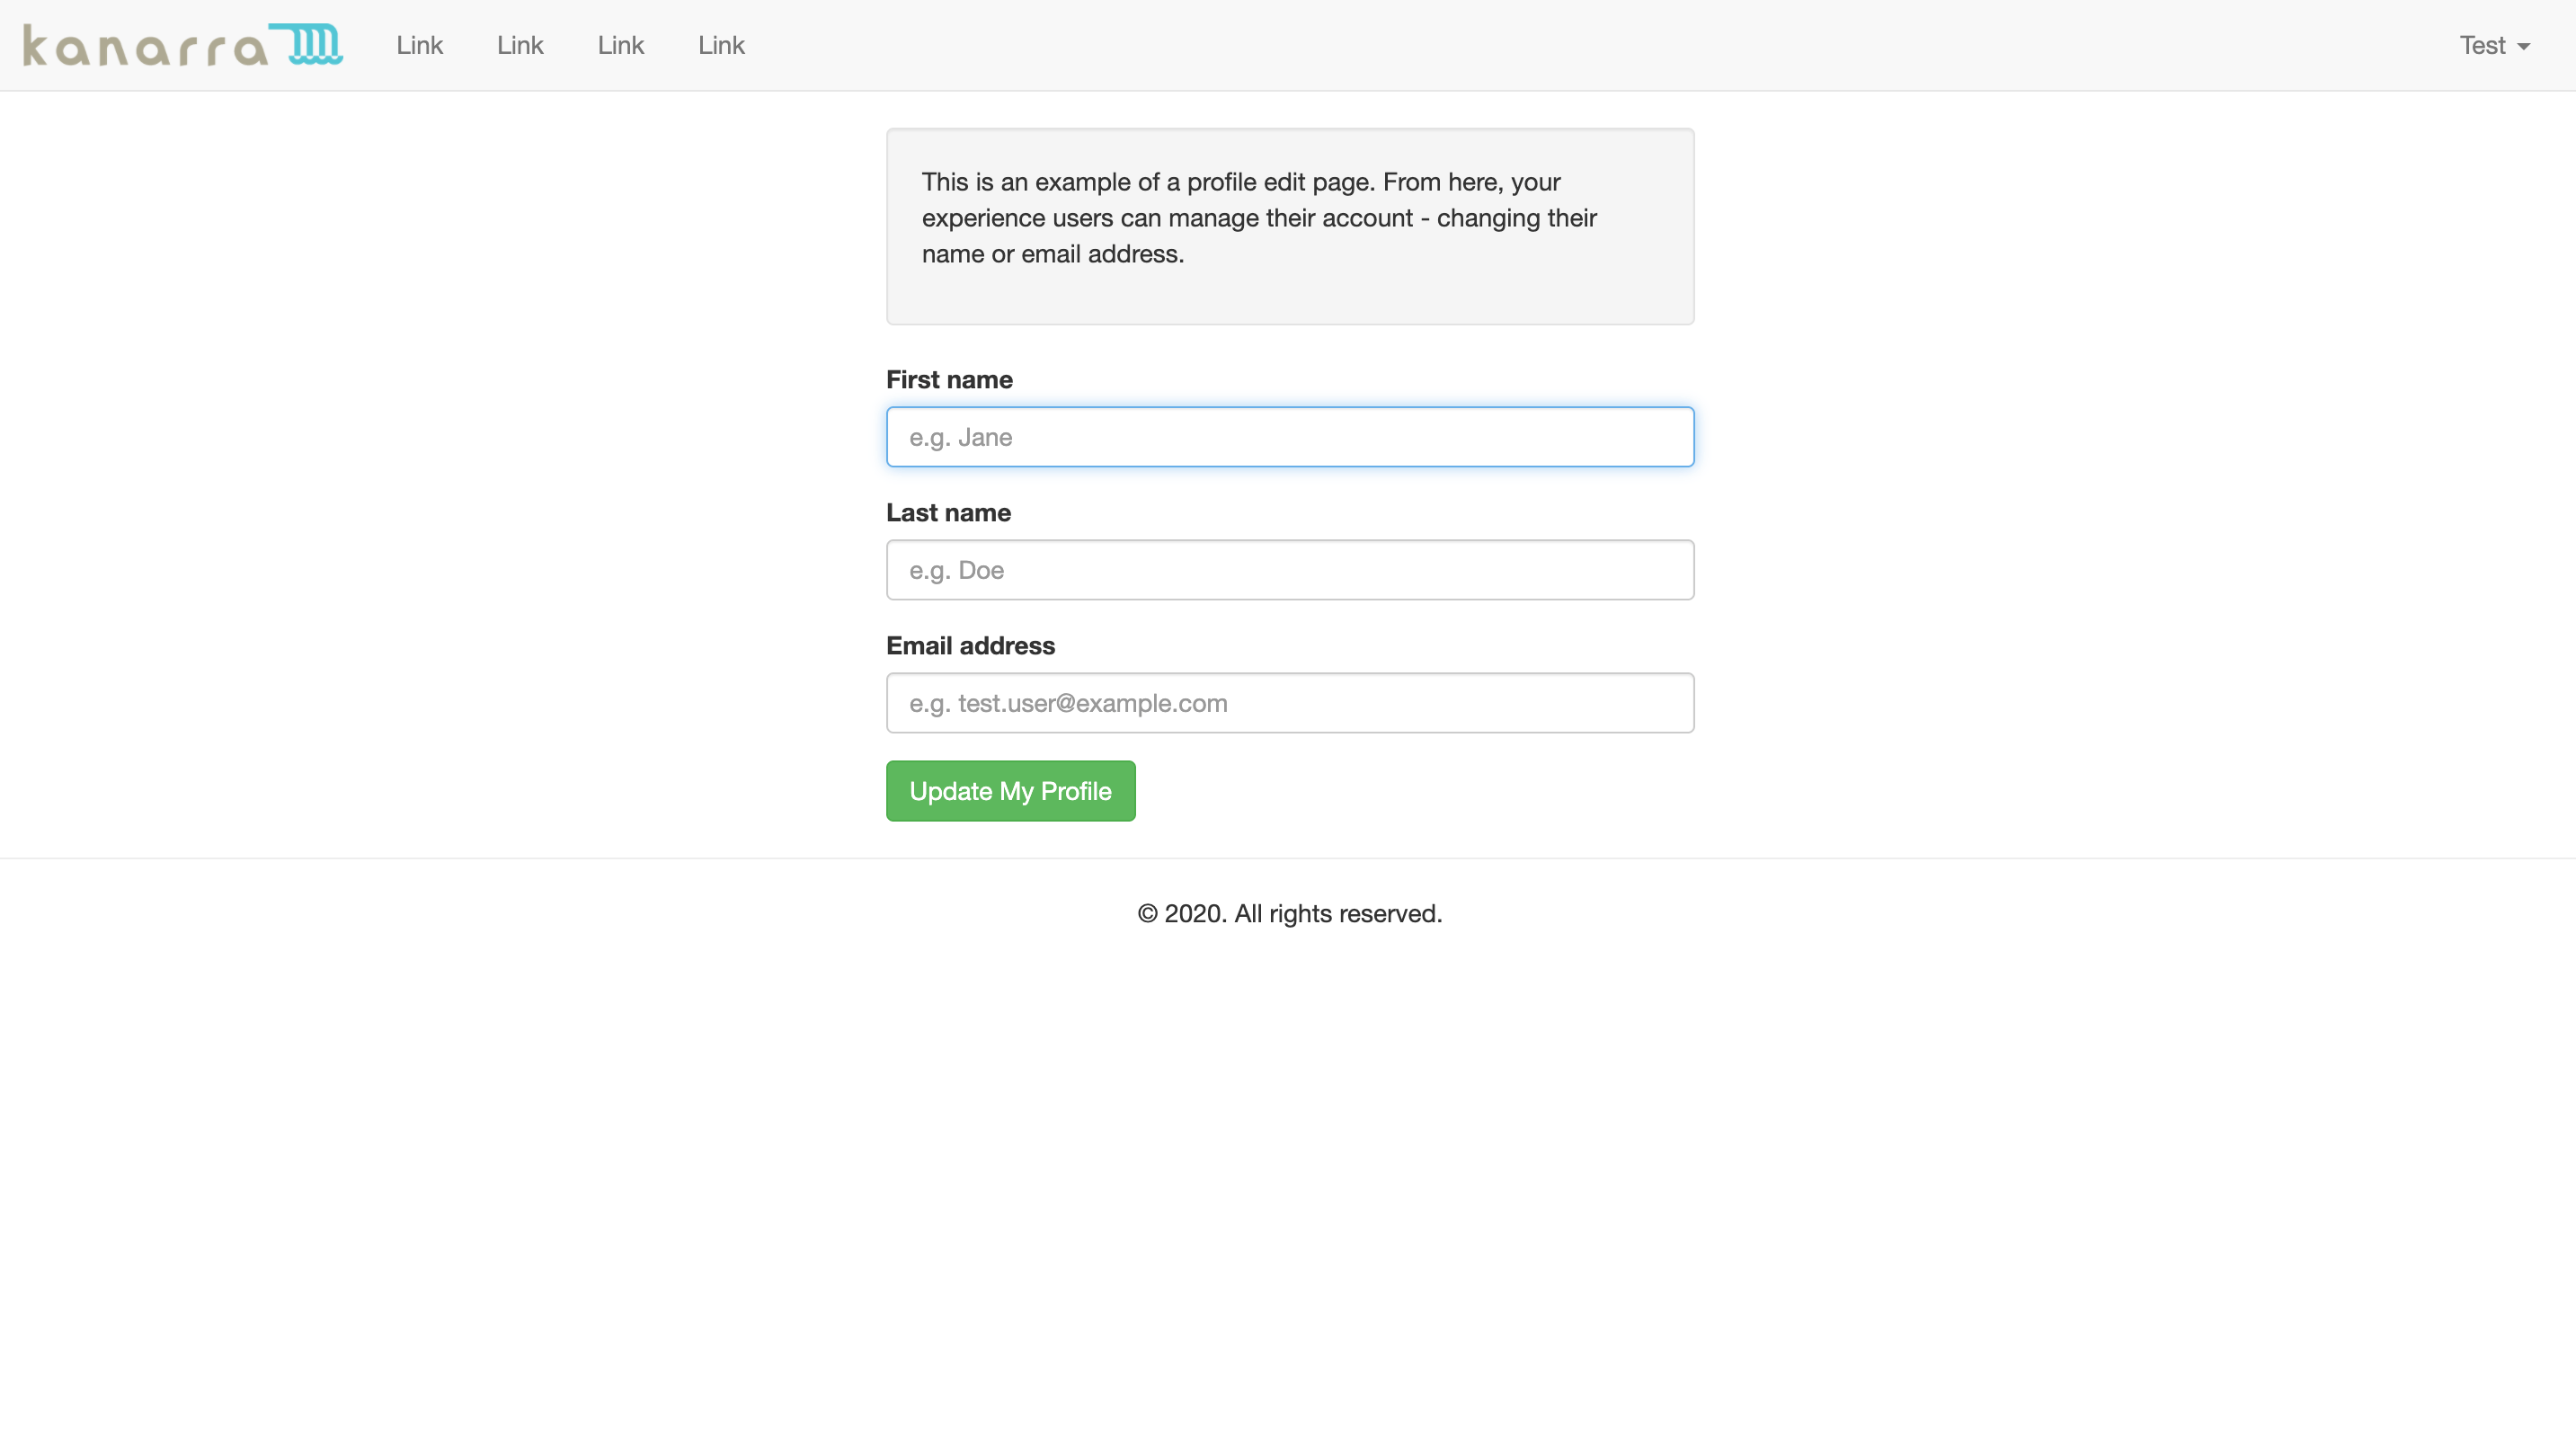
First, you'll create a new page to render when the /edit-profile endpoint is requested. From here, users can change their name and email address.
- Click "Views" in the left column to return to your Experience Views list.
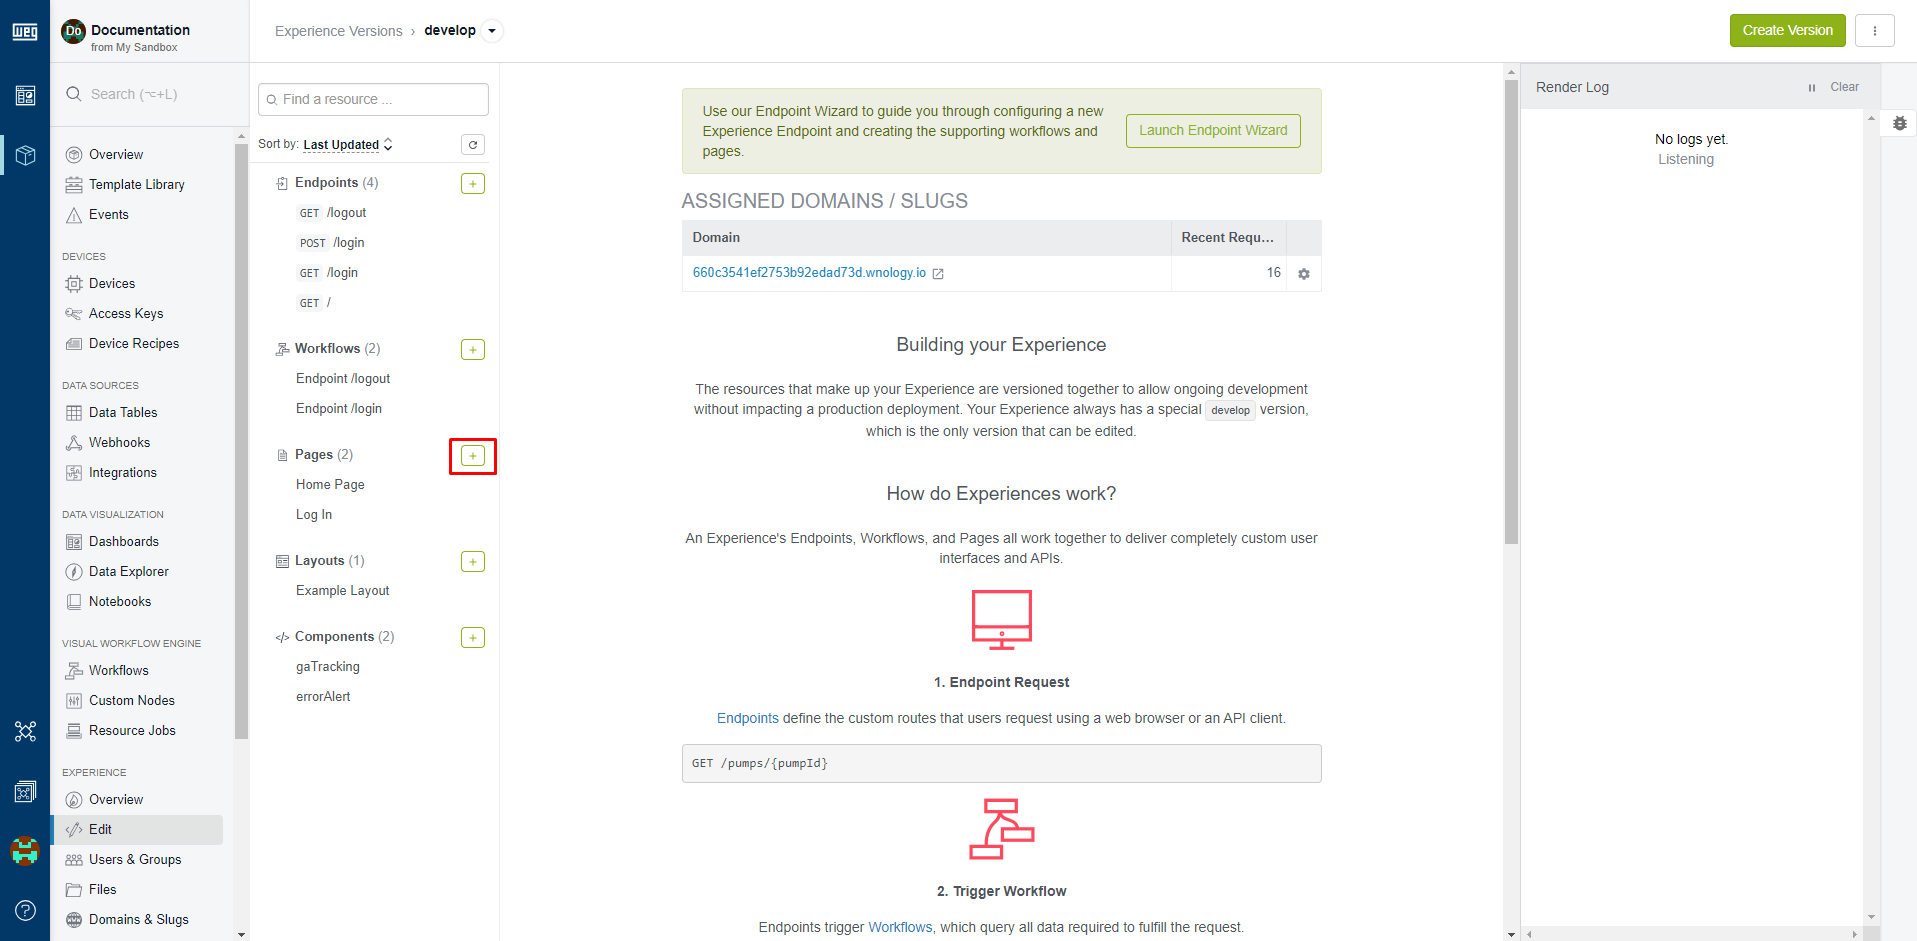
- Click the "Add" button in the "Pages" list.
Namethe pageEdit Profile.- Add a description; the field is optional and does not affect the page as it is presented to your experience users.
- Select your previously created layout for the page's
Layout. - Click "Create Page". This will redirect you to a screen where you can edit the new page's content.
- Copy this snippet and paste it for the page's
Content. - Once the page is ready, click "Create Page" to save your work.
Page: Change Password
Now, you'll add a page where users can change their password. They will have to enter their current password to set a new one.
- Click "Views" in the left column to return to the "Views" list
- Click "Add" in the "Pages" list.
Namethis new pageChange Password.- Select the same
Layoutas for your other pages. - Click "Create Page". This will redirect you to a screen where you can edit the new page's content.
- Copy this code to serve as the page's
Content.
Component: successAlert
You're referencing a new component in each of your newly created pages. This component is a simple confirmation box for telling the user that his/her profile changes were successful.
- Return to the "Views" page.
- Click the "Add" button in the "Components" list.
Namethe componentsuccessAlert.- Use this snippet for the component's
Content.
This component is almost identical to our errorAlert component, except it will display in green instead of red.
Component: profileForm
Finally, you'll tweak the profileForm component you created for user registration so you can reuse the component in your "Edit Profile" page.
- Navigate to the
profileFormcomponent from your list of components. - Replace its
Contentwith this snippet.
You're making one significant change to the component, which can be seen just above the closing </form> tag: If the component is being called from the /edit-profile route, you are excluding the password input from the form and changing the text of the submit button. You do this by checking if there is a current user with the {{#if experience.user}} block helper and conditionally rendering one bit of content or the other based on the route.
Step Three: Create the Workflows
Continue with the model you've followed so far by including the GET and POST methods for each route within the same workflow.
Edit Profile Workflow
- Download the workflow template.
- Import the file
endpoint-edit-profile.flowas a new experience workflow. - Update each of the endpoint triggers to point to the
POST /edit-profileandGET /edit-profileendpoints you created above. - Update the endpoint reply nodes to point to your
Edit Profilepage. - Enable the workflow (since imported workflows are by default disabled).
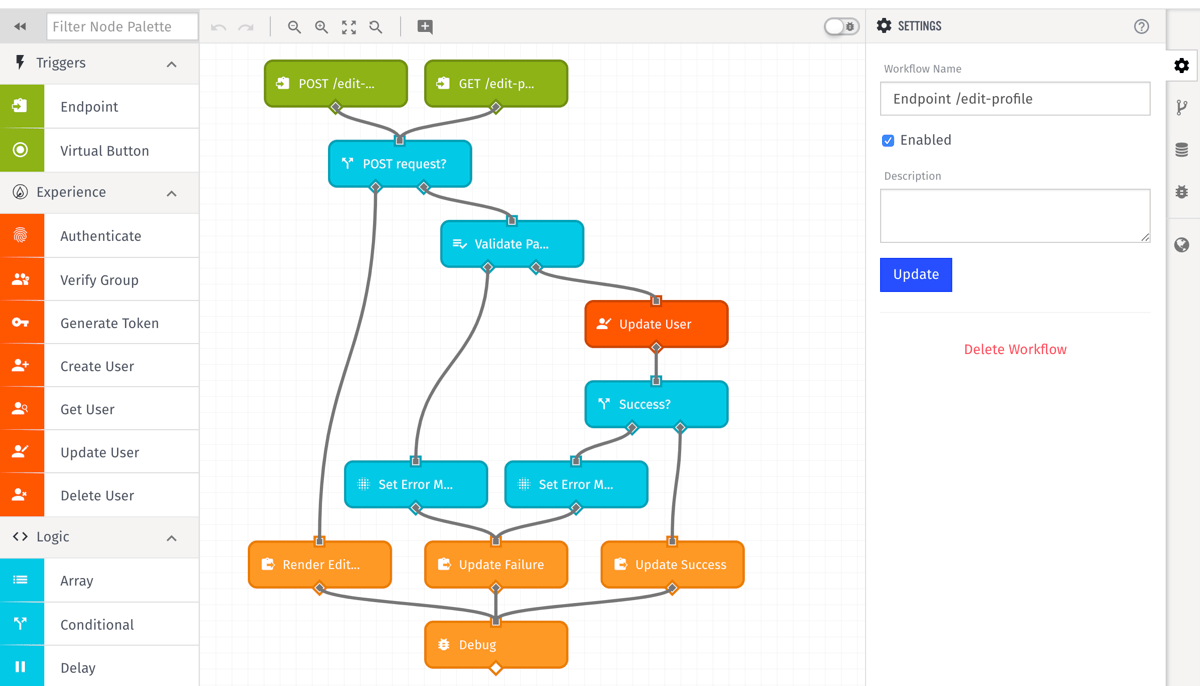
As a general overview, this workflow handles the following:
- If a user visits
/edit-profile, you respond to the request with your newEdit Profilepage. - When that user submits the
Edit Profileform, you validate that they have submitted all fields correctly. Then, you attempt to make the update. It could fail if, for example, the user attempts to change their email address to one that is already registered to another experience user. If either of these operations fail, you re-render theEdit Profilepage with an error message. - If the user update is successful, you redirect the user to the same URL with a
success=truequery parameter. The presence of this on the URL tells you if you should show yoursuccessAlertcomponent.
There is a comment on each workflow node describing its function in more detail.
Change Password Workflow
Now create a workflow allowing your logged-in users to update their passwords.
- Download the workflow template, then import the file
endpoint-change-password.flowas a new experience workflow. - Update each of the endpoint triggers to point to the
POST /change-passwordandGET /change-passwordendpoints you created above. - Update the endpoint reply nodes to point to your
Change Passwordpage. - Enable the workflow (since imported workflows are disabled by default).
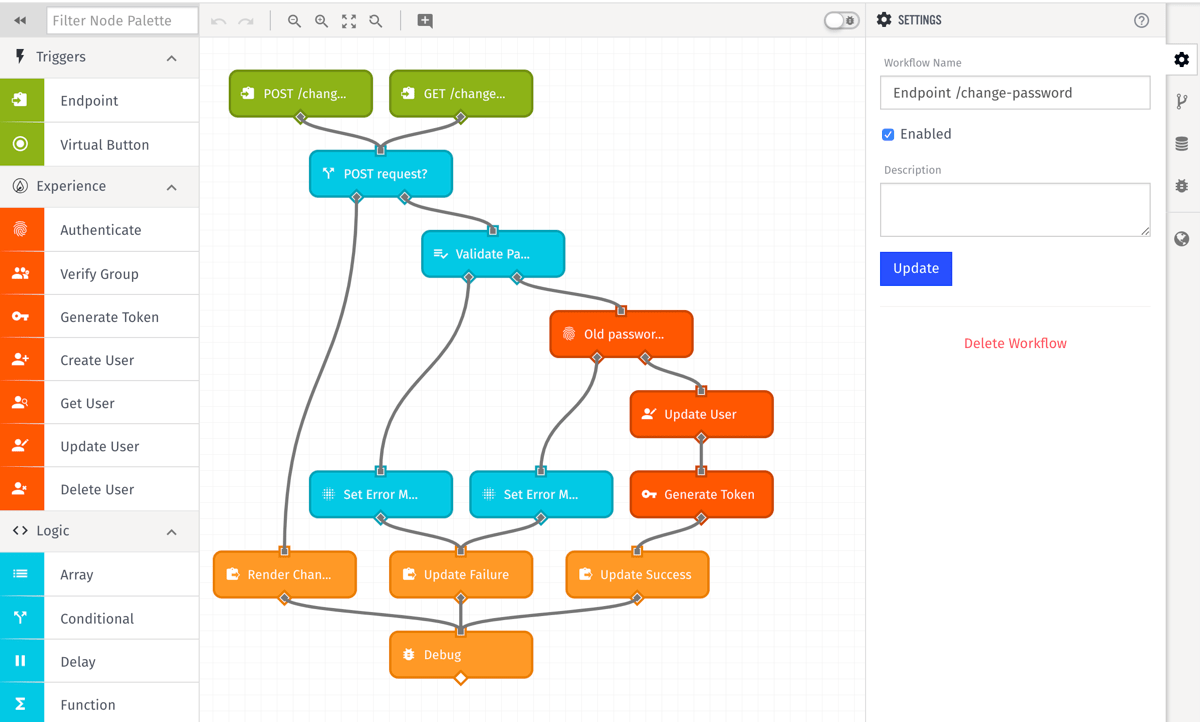
As a general overview, this workflow handles the following:
- If a user visits
/change-password, you respond to the request with your newChange Passwordpage. - When that user submits the
Change Passwordform, you validate that they have submitted valid old and new passwords. Then, you try authenticating using the old password provided by the user. If any of those checks fail, you re-render theChange Passwordpage with an error message. - If authentication succeeds, you change the user's password and display a confirmation message.
There is a comment on each workflow node describing its function in more detail.
Step Four: Link to the Feature
Finally, give your experience users a way to reach the features you just completed.
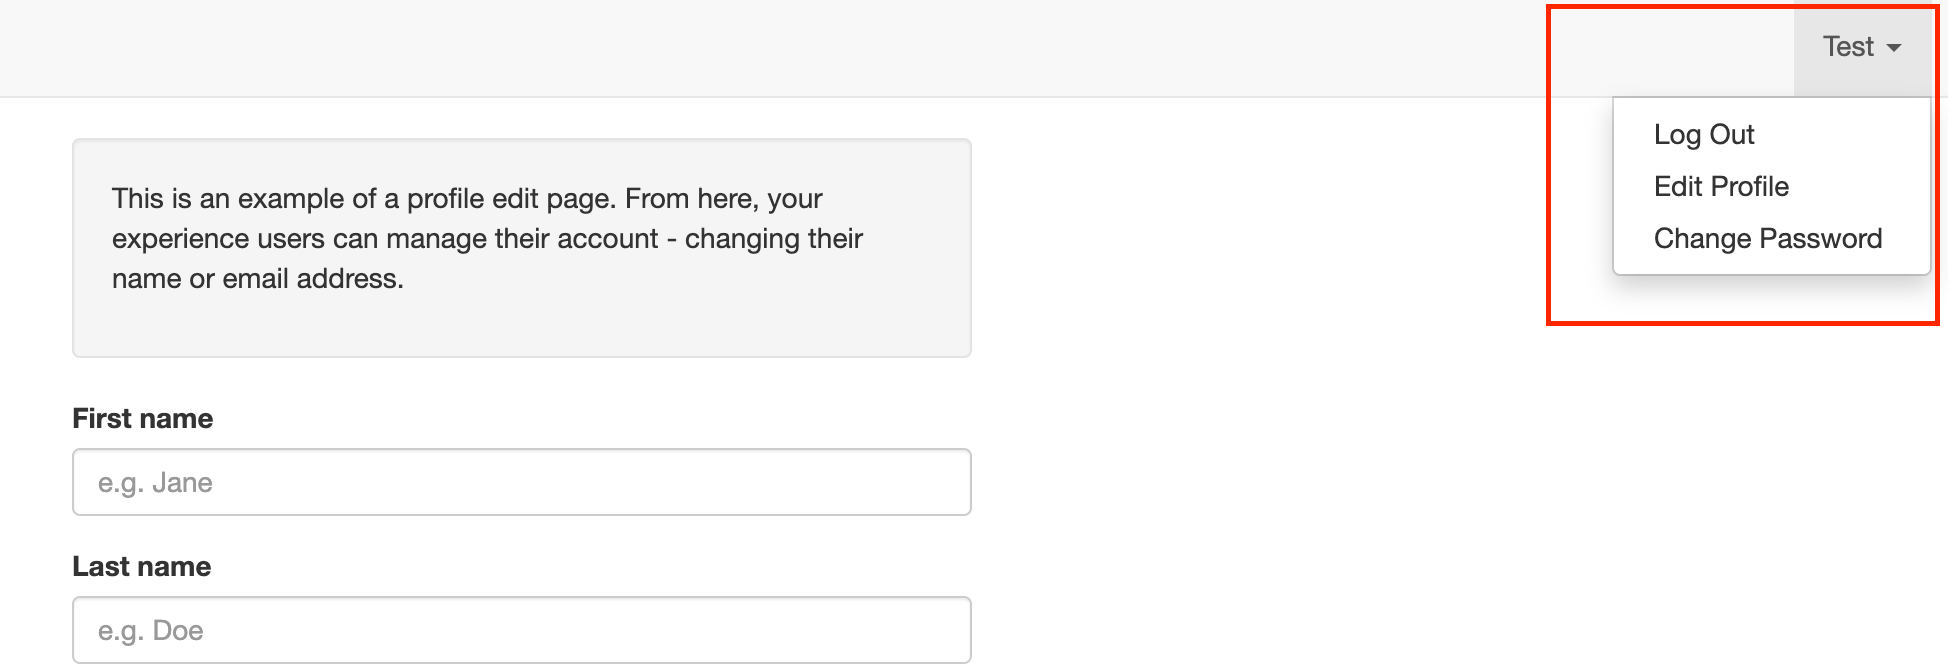
Component Edits: userIndicator
Currently, your userIndicator component displays a single-item dropdown menu in your layout's top right corner when the user is logged in. Add links to our two new features into that menu.
Navigate to the userIndicator component from the "Components" list. In the Content, immediately above this line:
Add the following two links:
Alternatively, you can copy this content and overwrite the entire userIndicator component.
Now, a signed-in user can access the /edit-profile and /change-password links from their contextual menu.
What's Next
This concludes this tutorial, in which you've added the ability for experience visitors to register for an account and start accessing parts of the experience that were previously open only to logged-in visitors.
Next, you'll build on top of what you've done here to add a reset password flow.
Was this page helpful?
Still looking for help? You can also search the WEGnology Forums or submit your question there.