Build a Home Page for a WEGnology Experience
In the previous part of this walkthrough, you learned how to create a login page to allow your Experience Users to authenticate against your custom experience. This part expands your experience to include a custom home page that only logged-in users can see.

Step One: Create an Experience View
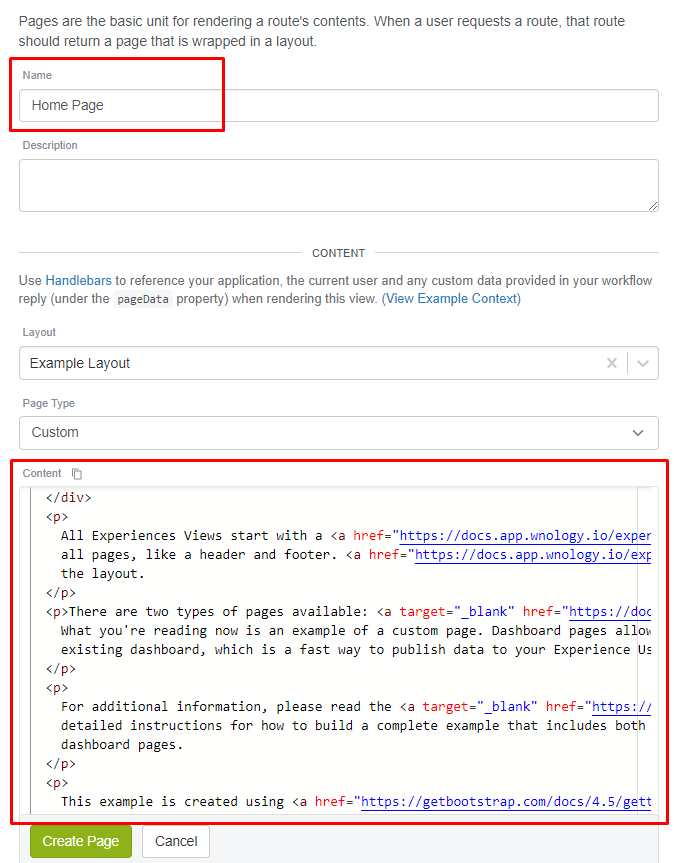
The first step in building the home page is to create the view with the content.

Set the Layout to the layout you created earlier in this walkthrough. Once you click "Create Page", you will redirect to a screen where you can edit the new page's content.
Here is the page content:
Copy/paste above into your new page.
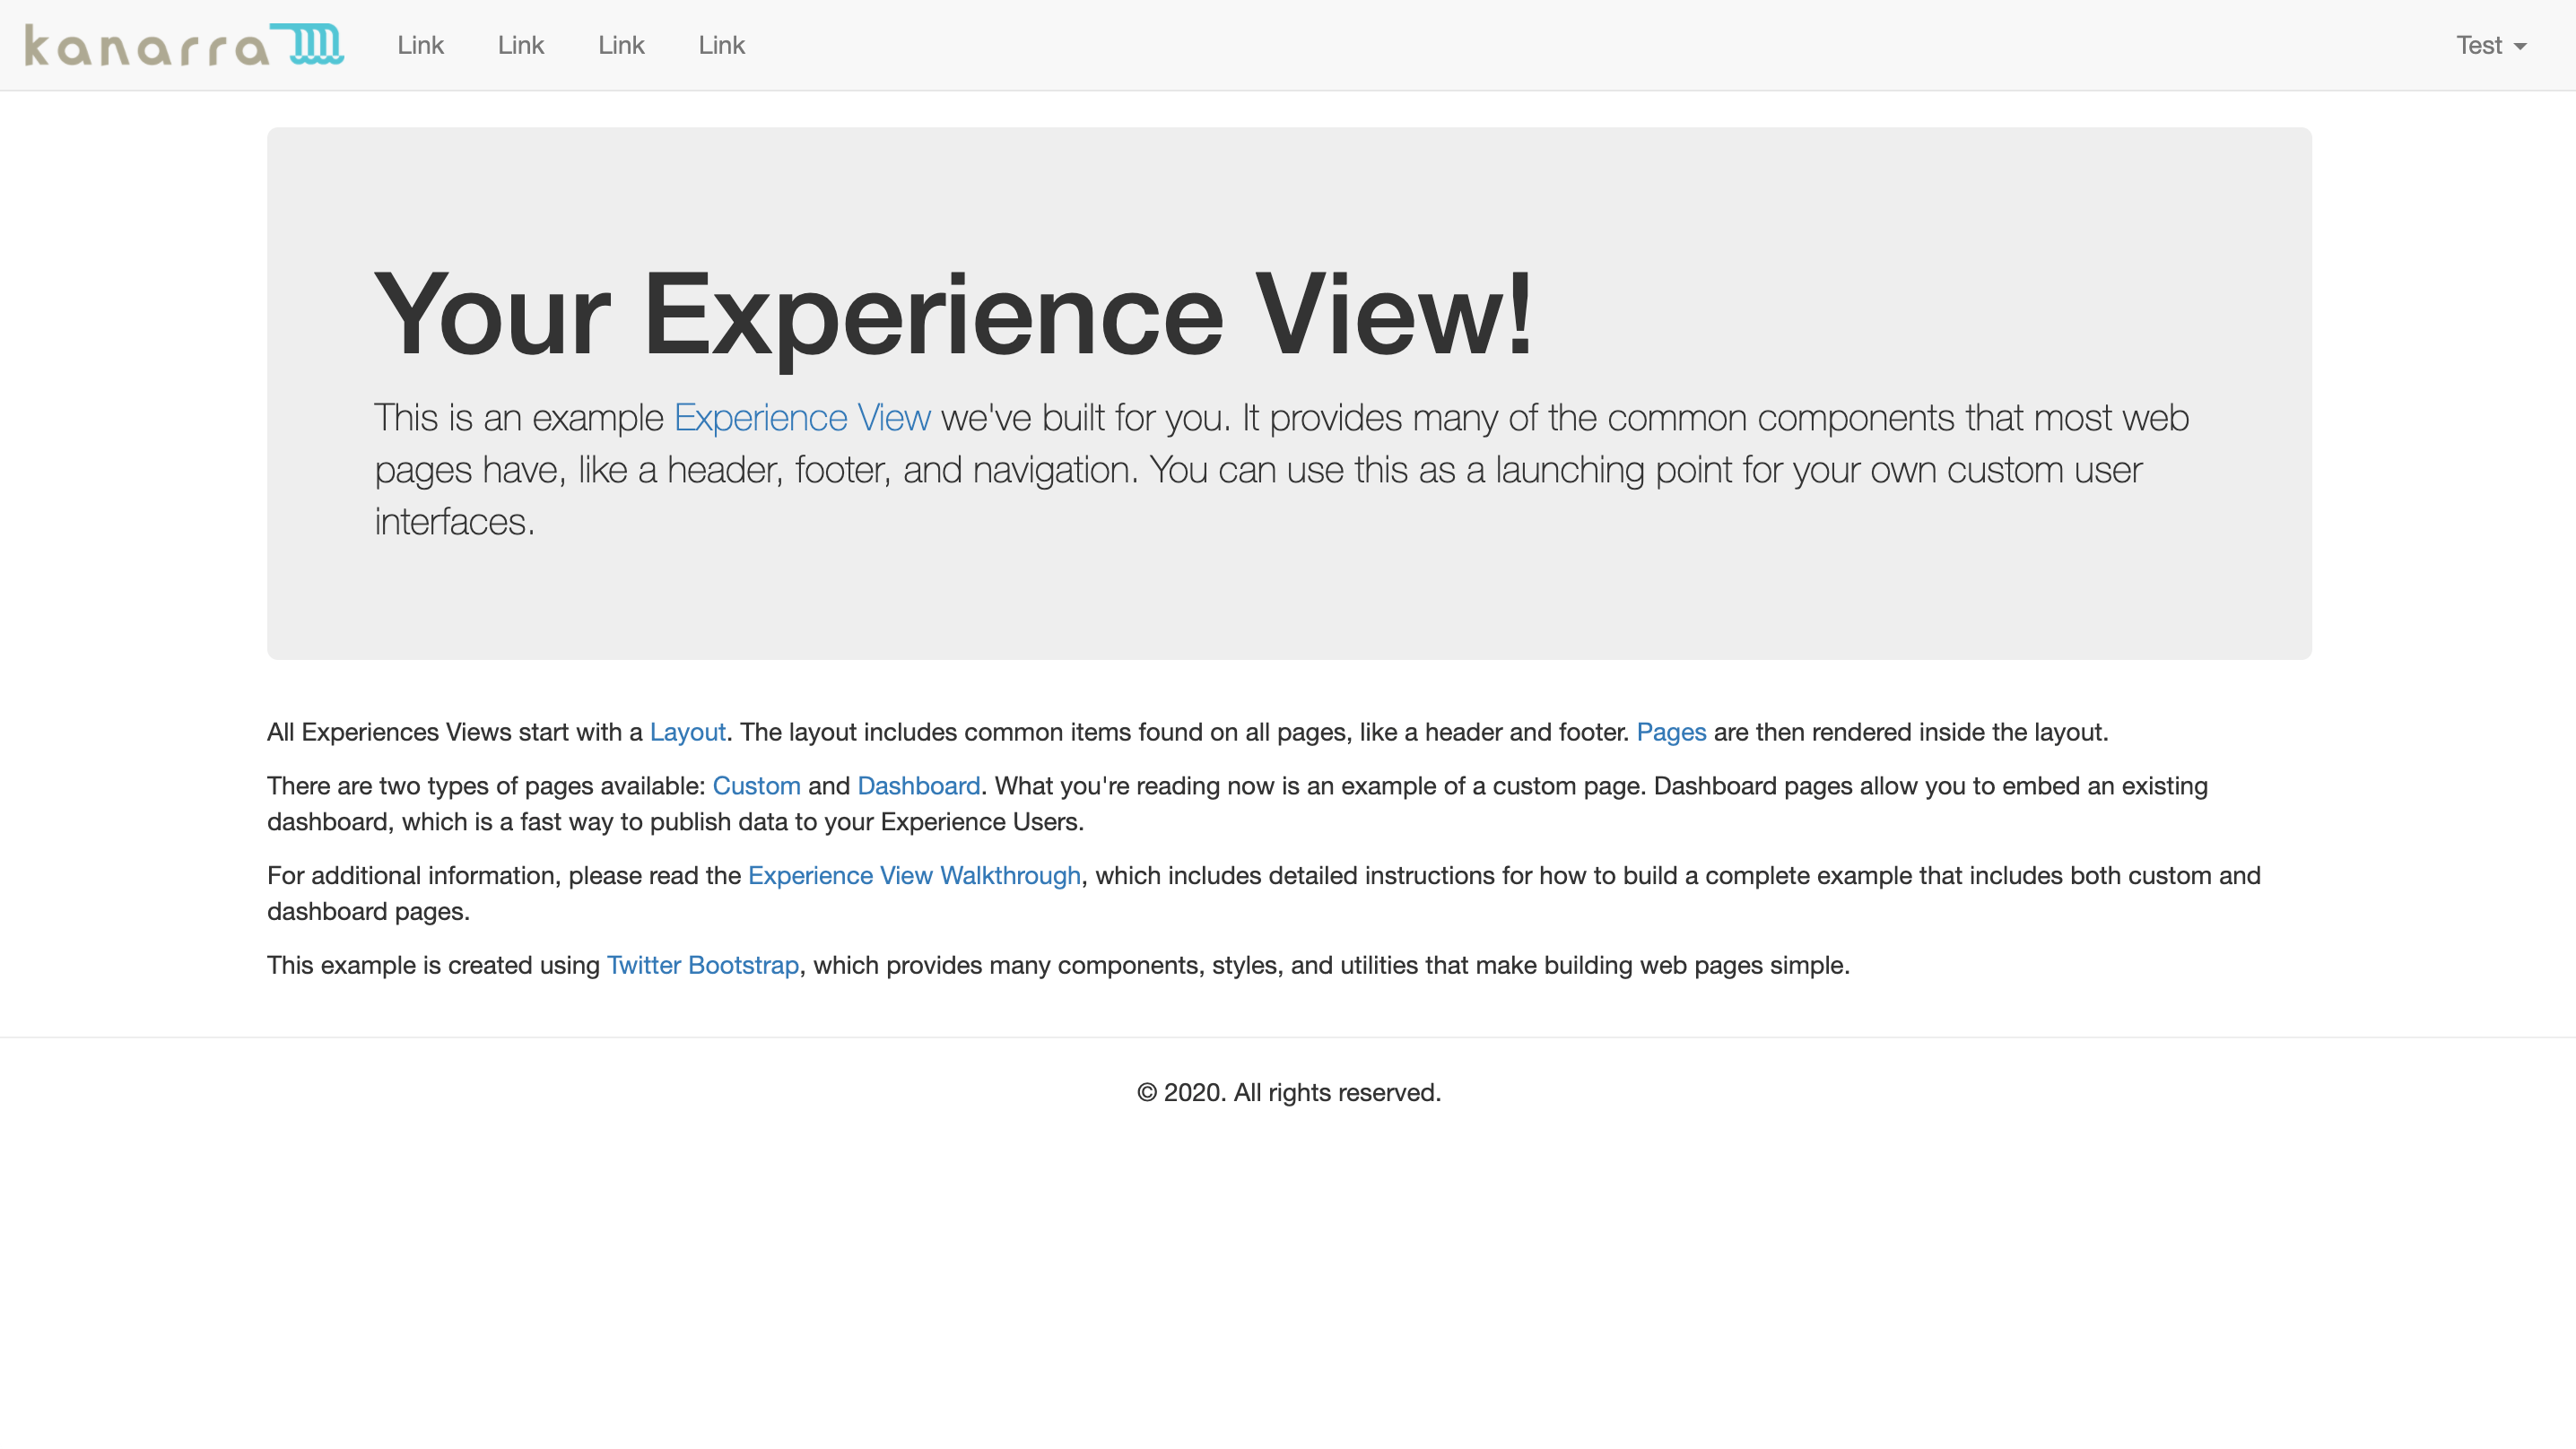
This home page example is mostly Twitter Bootstrap markup for laying out the content, plus a {{#fillSection}} helper similar to what was part of the Log In page.
Step Two: Create the Experience Endpoint
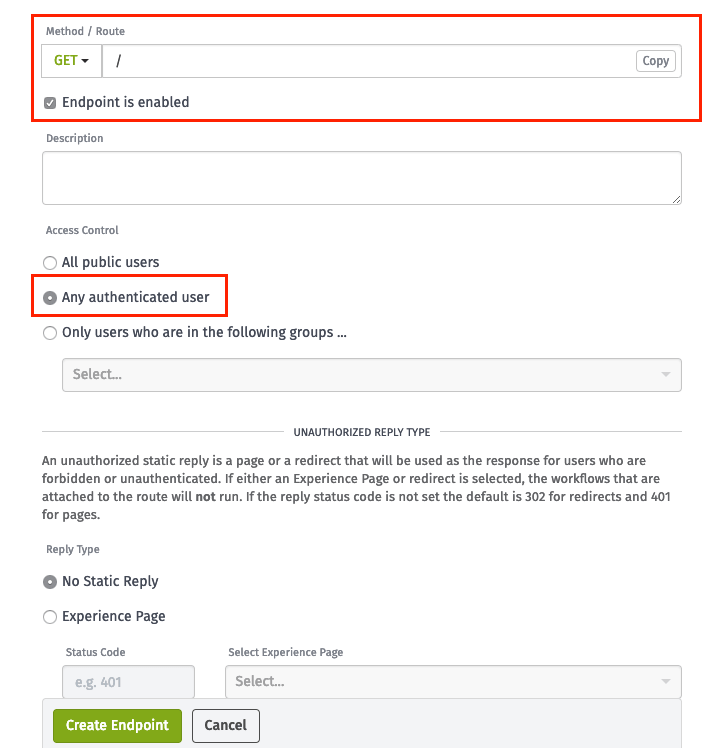
Next, create the endpoint that returns the page you just created.

Set the Method / Route to / and set the Access Control to Any authenticated user.
Step Three: Use Static Replies
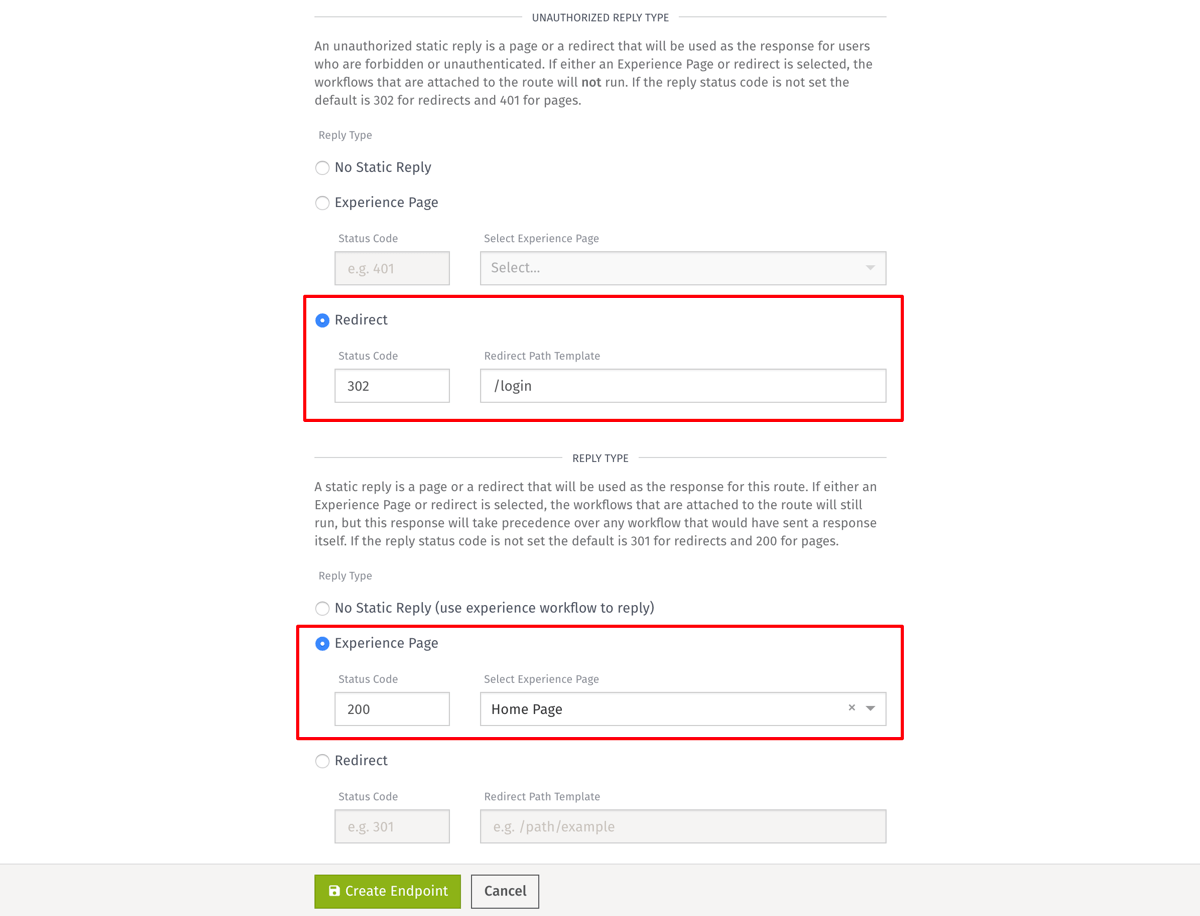
Next, you need to use static replies. When your endpoint does not need complicated logic, you can use static replies to immediately redirect or render a page (and so you don't need to create a workflow).

In this case, there are two static replies:
- One for when there is an authenticated user.
- One for when there is not.
In the case where there is no authenticated user, the Unauthorized Reply redirects to /login to force the user to log in. In the case where there is an authenticated user, it replies directly with the page that you created above, the Home Page.
Now that the page and endpoint with static replies are created, your home page route will work. If you request the / route while not logged in, you'll be redirected to /login. At that point you can log in and then you'll be redirected back to / to view your home page content.
What's Next
This completes this part of the walkthrough. The following parts of this walkthrough will begin adding additional functionality that is common to most web pages.
Was this page helpful?
Still looking for help? You can also search the WEGnology Forums or submit your question there.